Holidays Done Gluten Free

Spring Is Here And We Have Some Exciting News!

Okay so we’re officially into Spring, as my allergies could tell you. Even though the Zyrtec hasn’t kicked in yet we celebrated our first Easter as a family of four. Everything about Easter I love, the flowers (minus the sneezing and puffy eyes), the Spring Day weather (usually), and of course the excitement that the holiday brings. And even though it was chillier this Easter, both of my girls still loved it all, from start to finish.

Easter (1) 
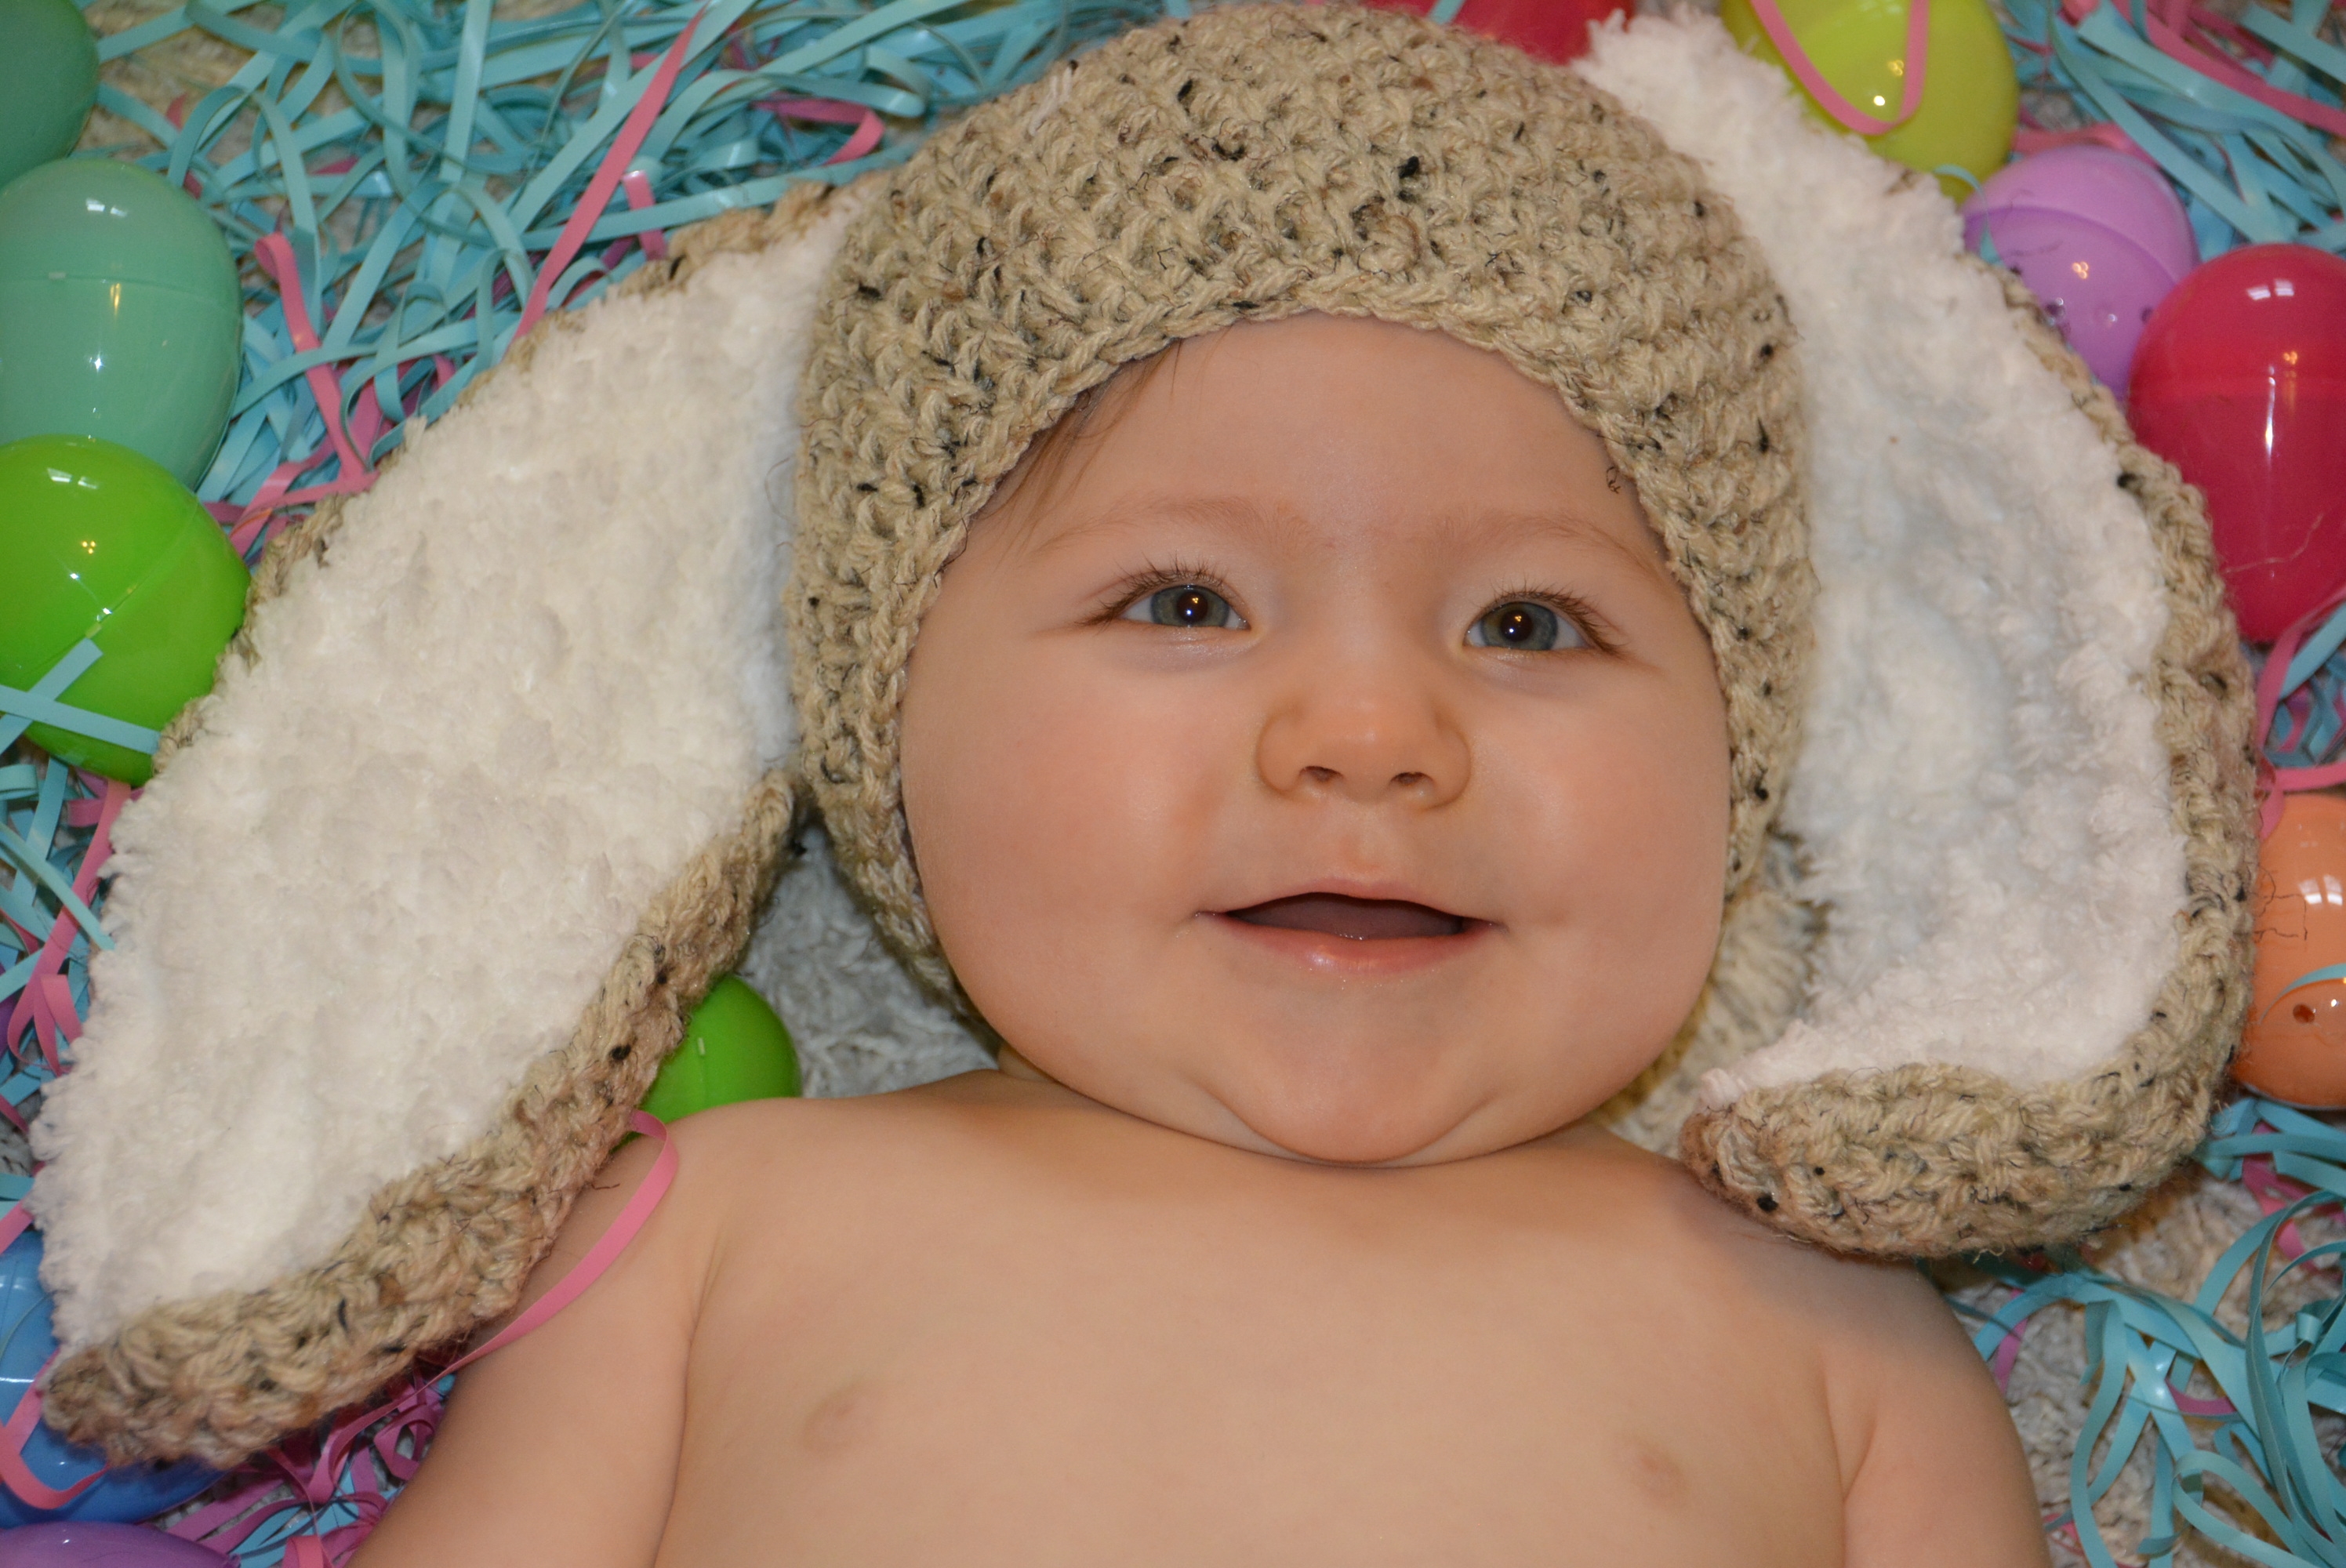
Bunny Hat, JWhiteFlower, LLC on Etsy

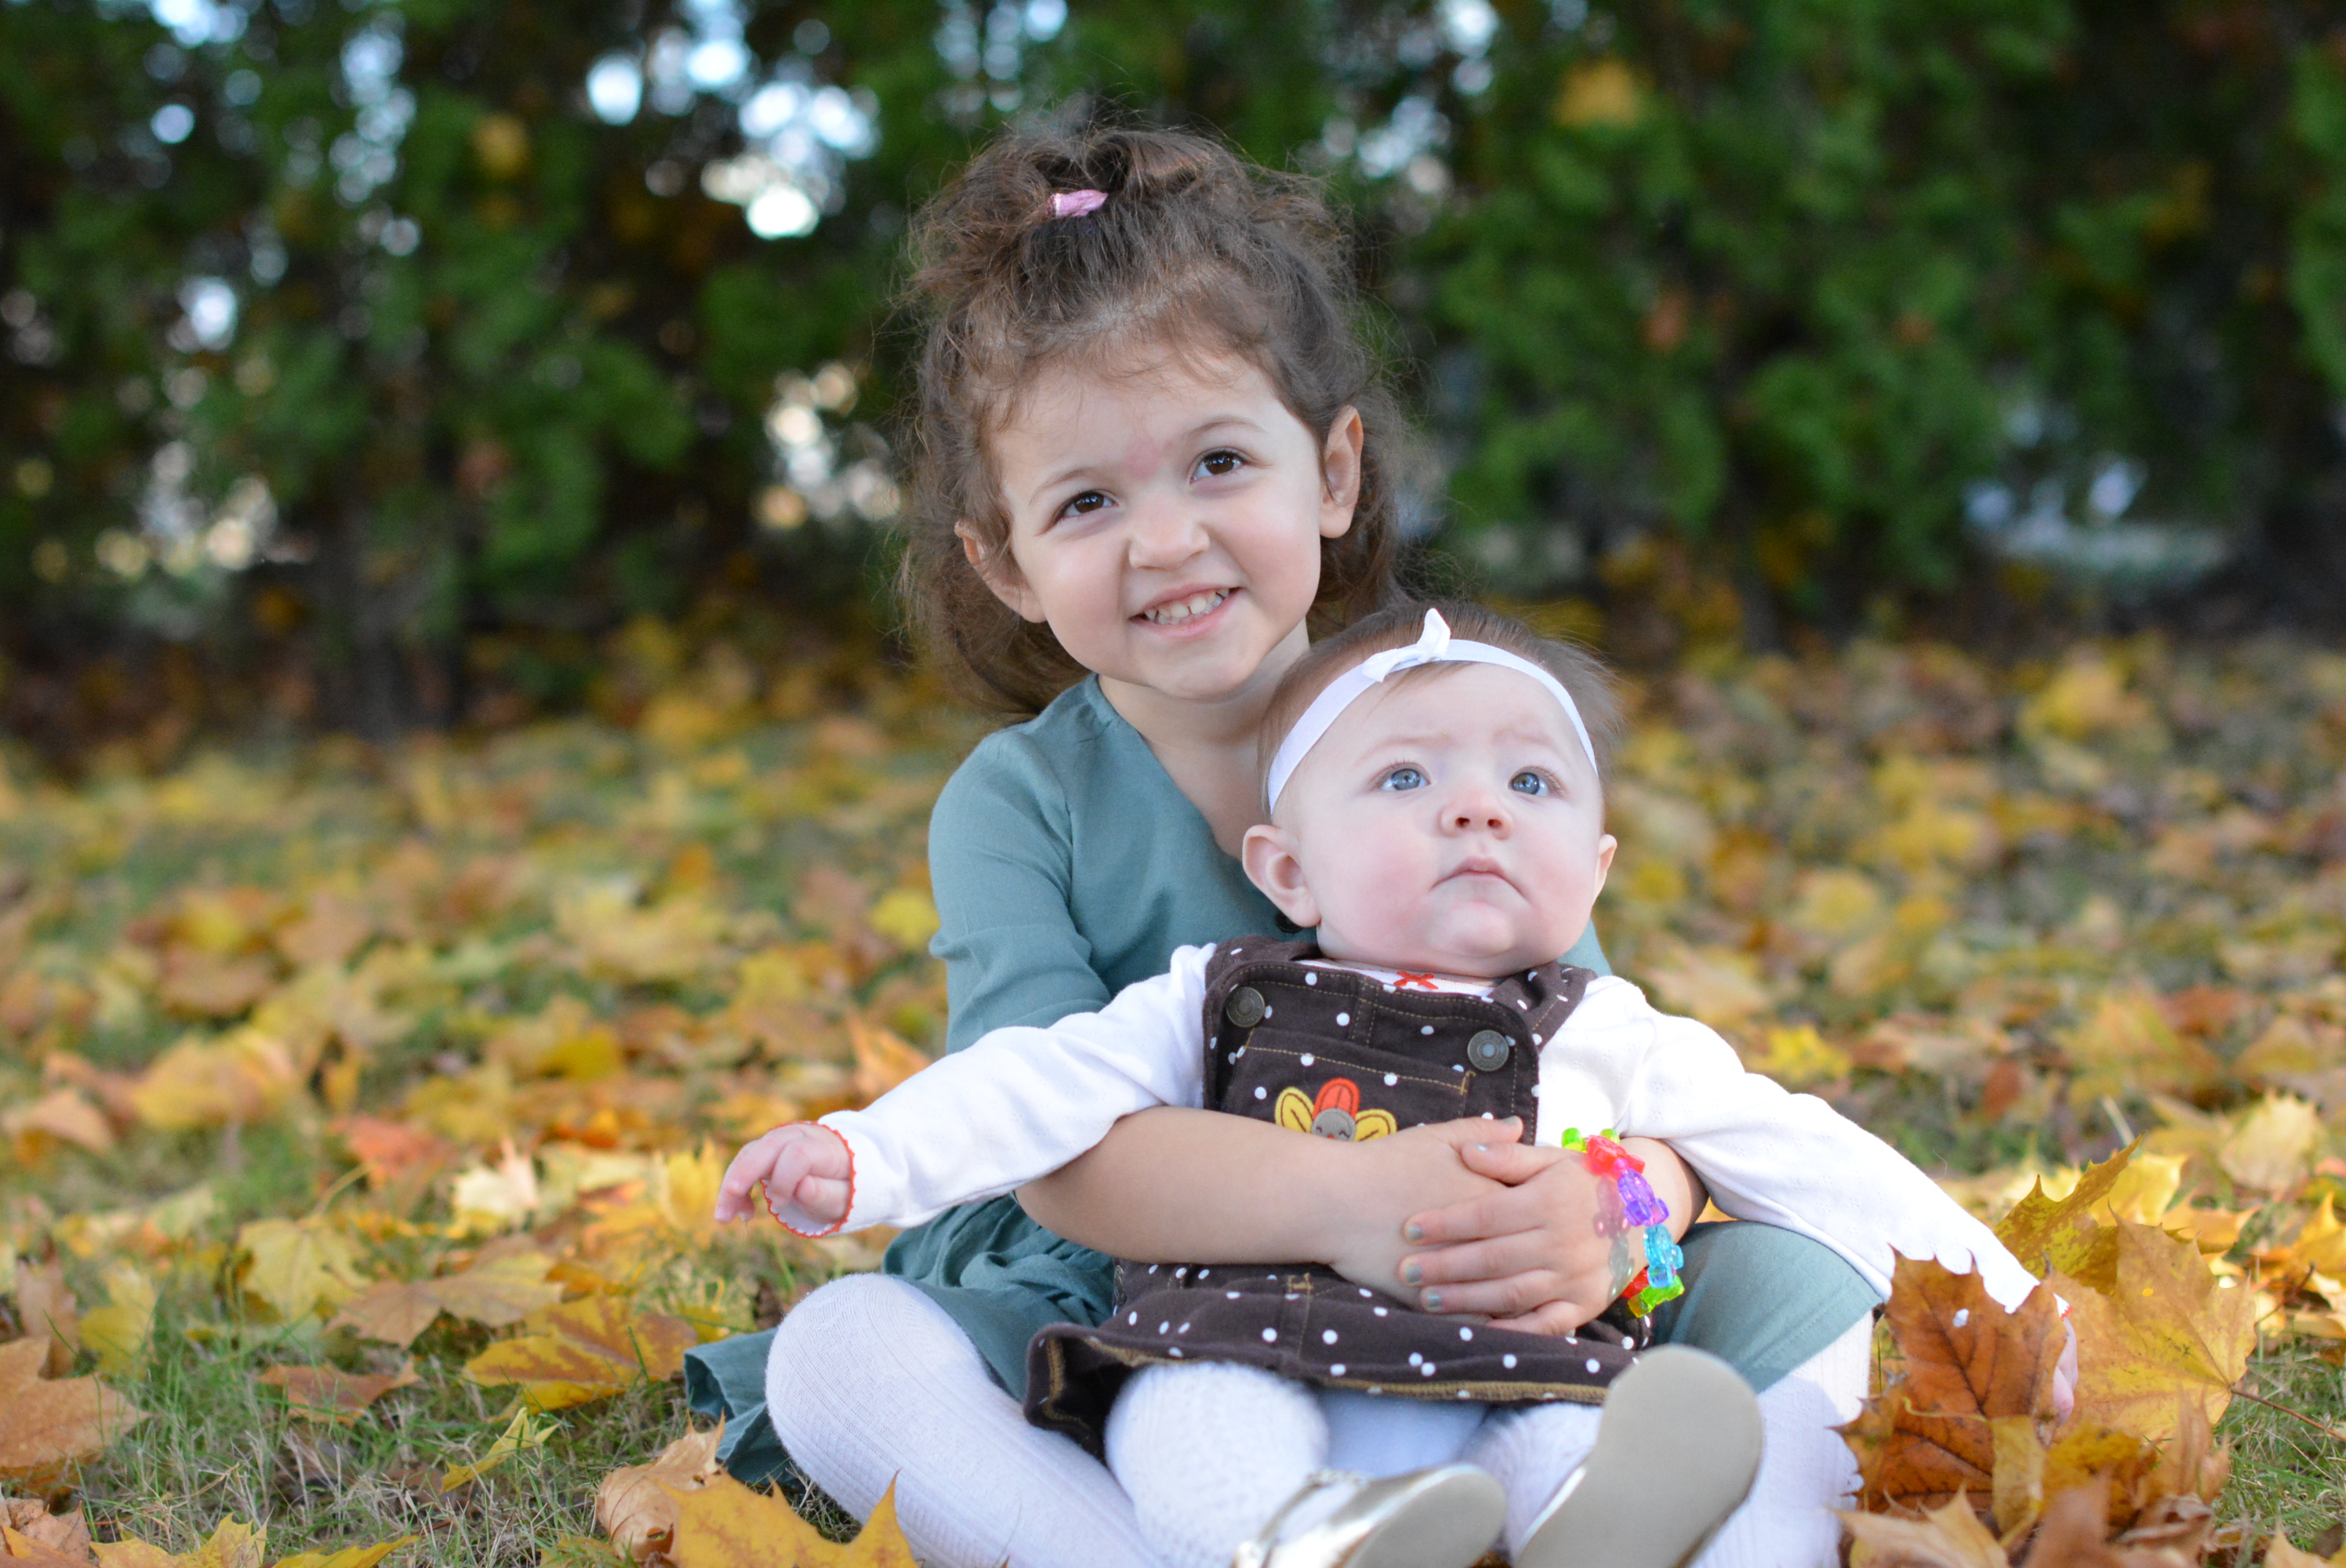
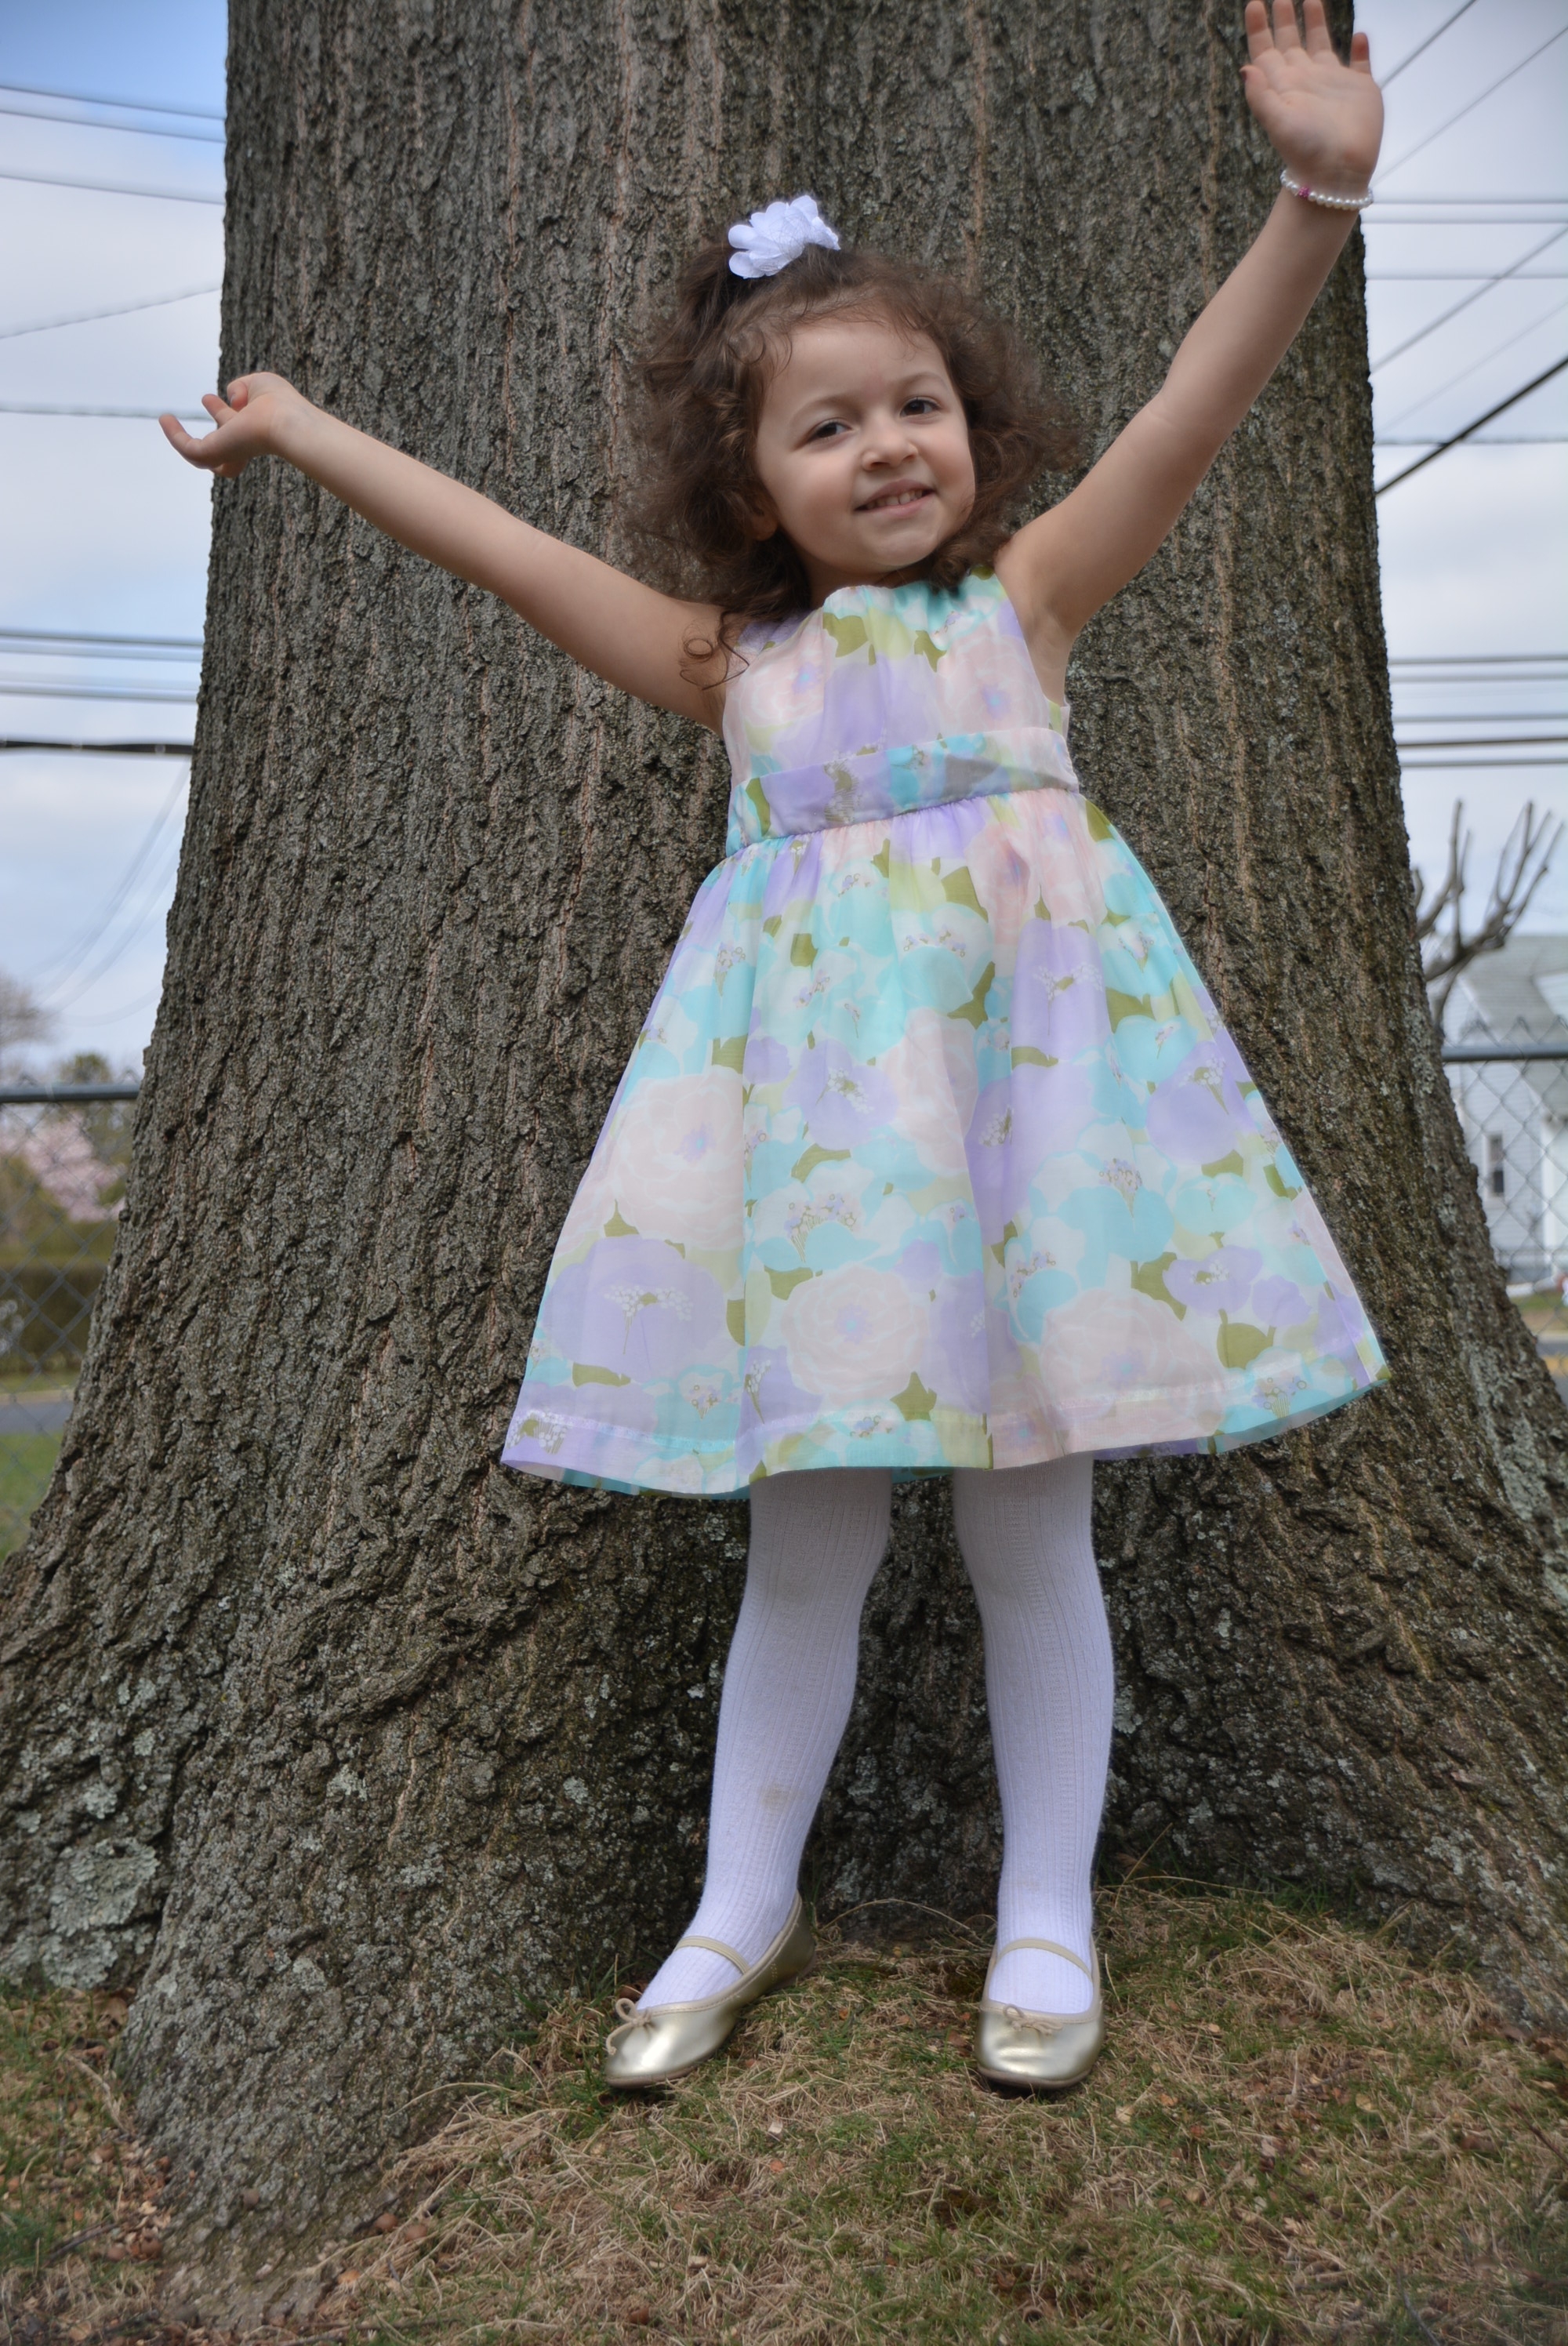
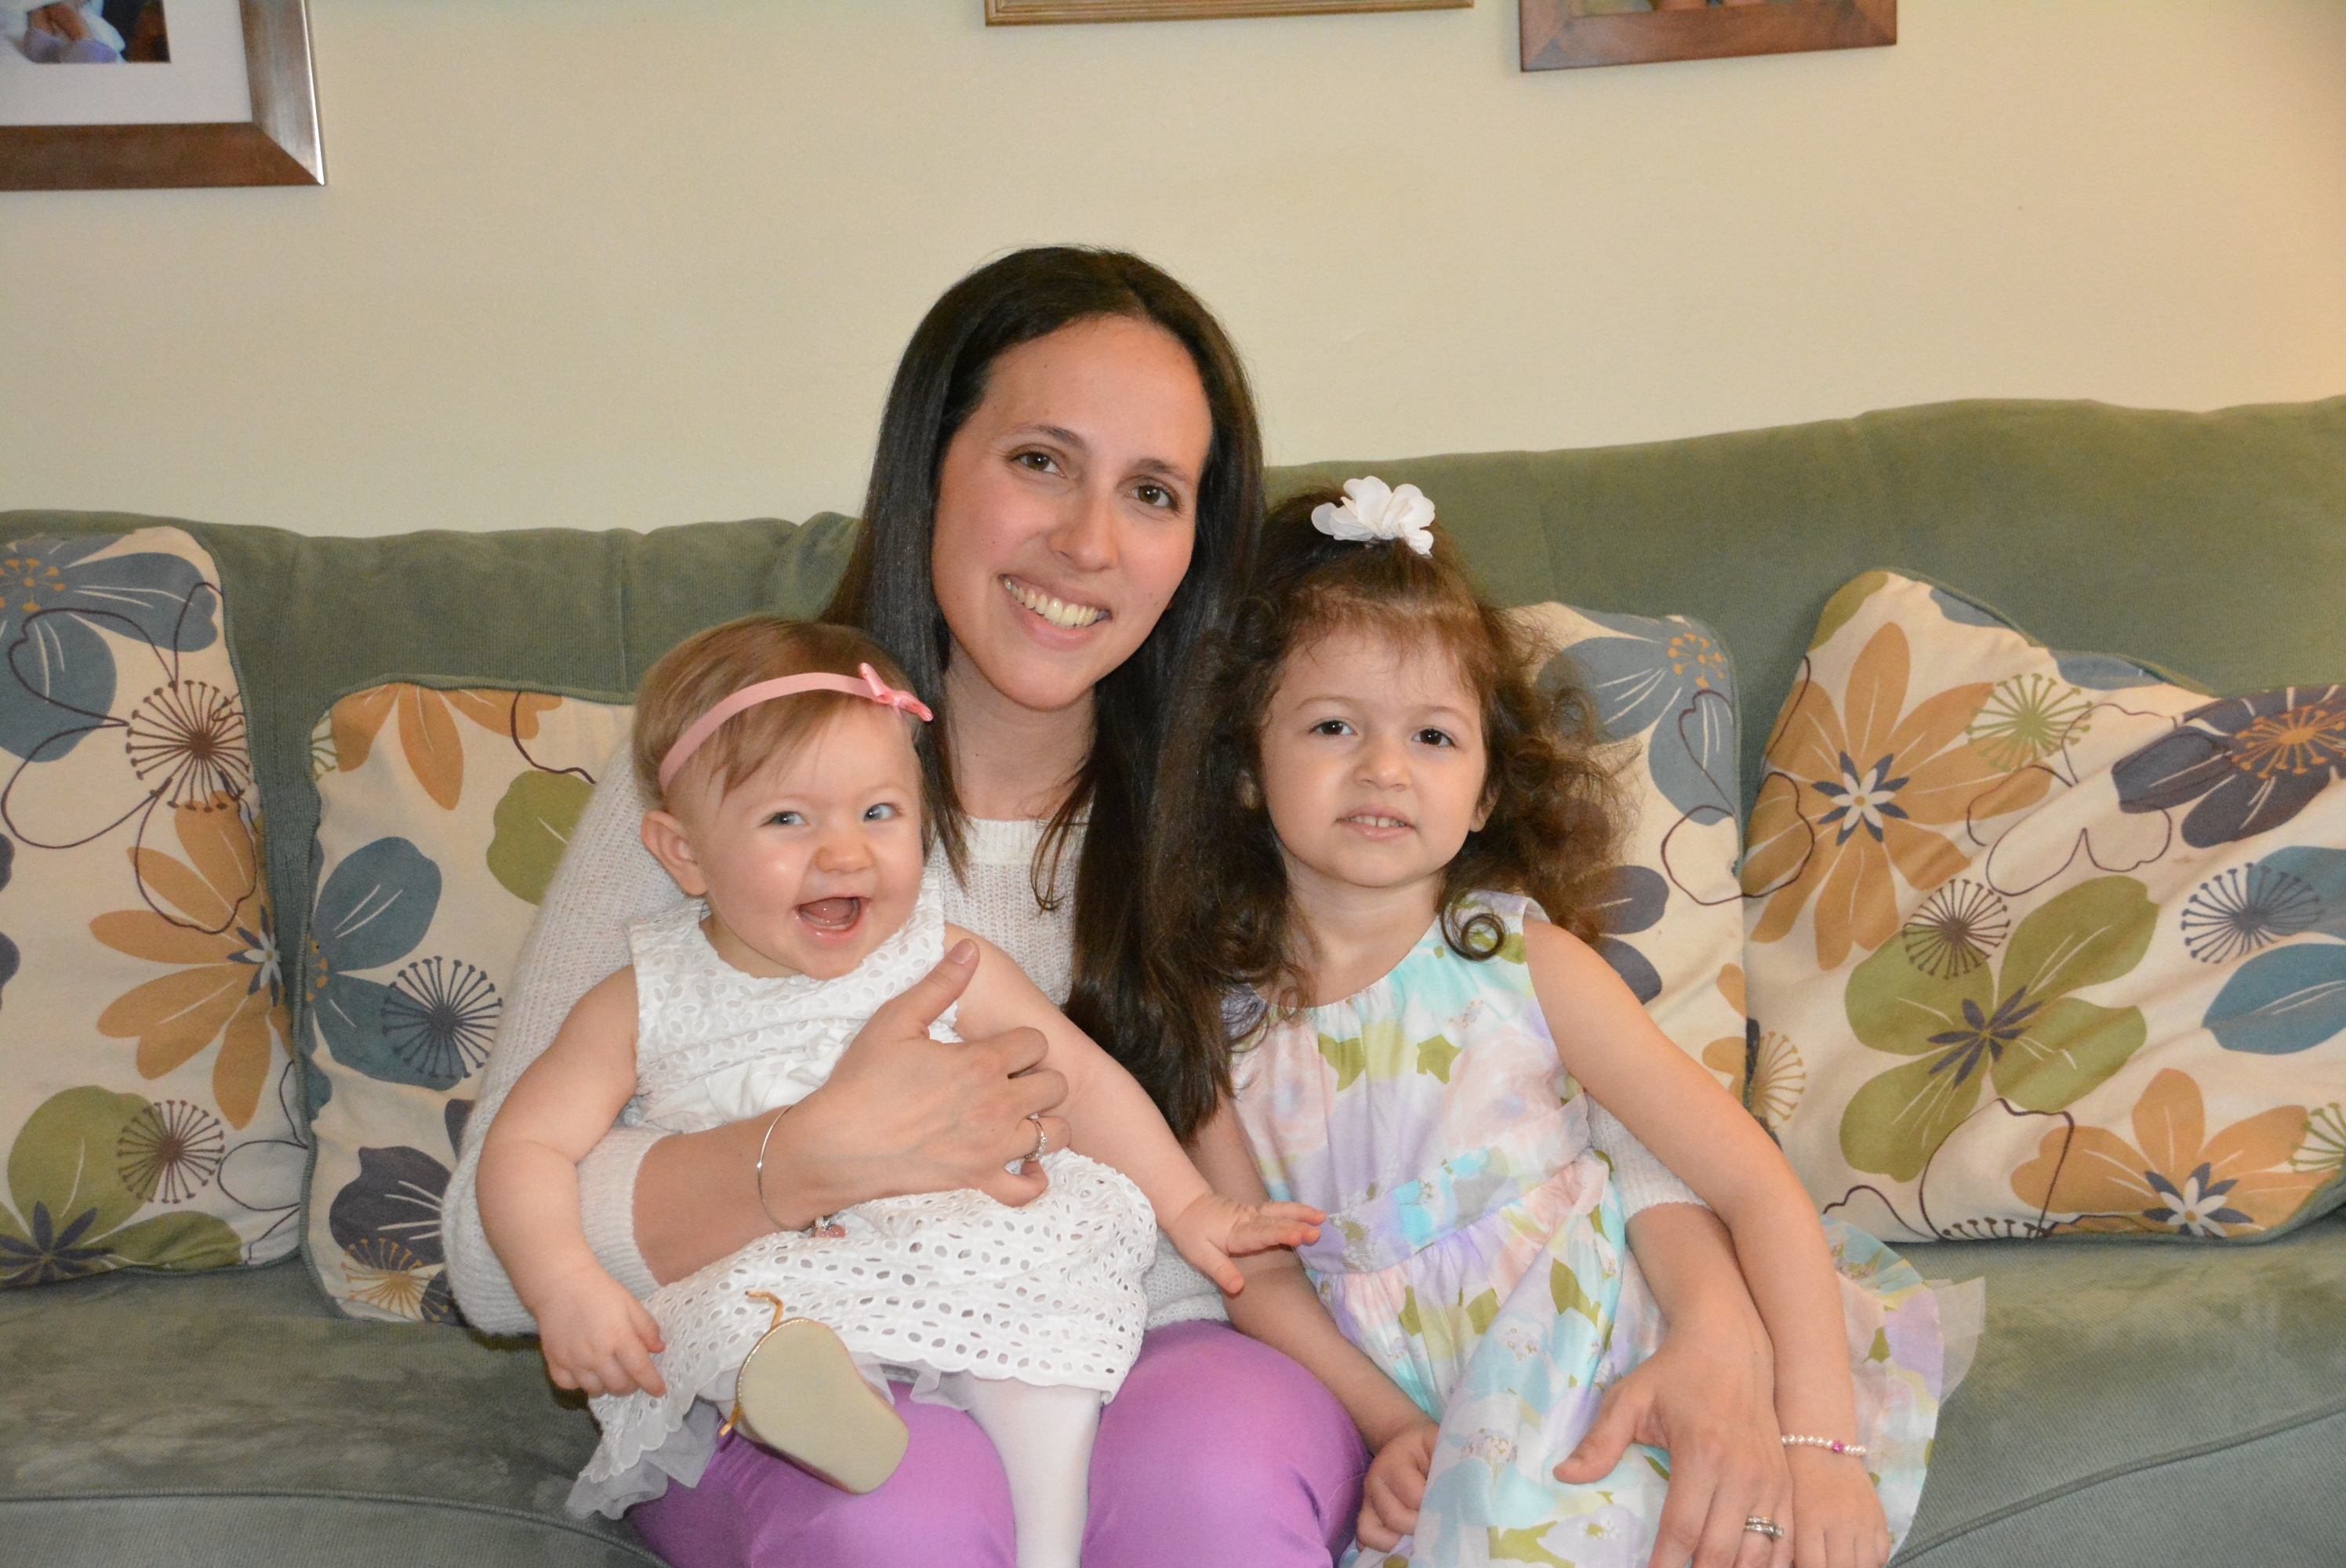
This adorable bunny celebrated her first Easter and she loved every bit of it! We kicked off the day with early Easter baskets. Our toddler was amazed at the goodies, I just love the complete and total surprise look on her face. Even better, the bunny paw prints which she couldn’t stop staring at. Our tiniest girl woke up early too and through her sleepy eyes managed to meet her new soft Disney friends and dig into her Easter basket a little. After a quick breakfast, the girls were in their best Easter dresses and ready for church. And the rest of the day was filled with Easter egg hunts, a great gluten free dinner, family, and a new Disney movie from Mommy and Daddy. All ending with two very sleepy girls, getting a head start on their bedtime by a good hour and a half. Easter (2)

With Easter 2016 added to our photo album, it’s onto normal Spring fun and then DISNEY!!!! We couldn’t be more excited for our first vacation as a family of four! But before then we’re starting another chapter in our family’s book by officially putting our house up for sale.  Easter (3)

The whole idea of moving is a horrible concept to me. The unknown of where we’re going, if our own house will sell, the actual act of packing and moving, finding a new house that feels like our home, and the idea of change now with two little girls. But even though moving isn’t overly appealing, this was our starter house. We started here before there were two little us’s, before there was our fur daughter, even before we were married. We bought this house, made it a home, and shared so many amazing memories. We brought our newborn baby girls home here, we spent our first years as a married couple here, we brought out first official furrier baby home here, and we celebrated milestone after milestone right here. Wait, why are we moving again? Oh yeah, but we’re kind of outgrowing it now. Our family has grown and we’re ready to start a new adventure.   Easter

The hardest part for me is leaving our house behind. It’s beautiful and holds such an important piece of our story, But even though it’s a little sad, we’re just as excited to see where our future will be. So now the real fun begins. Selling and buying, yay! Wish us luck!

Sincerely,

Lindsay

Christmas Cookies Just Like From When You Were Little, Only Gluten Free!

Christmas music, wrapping presents, admiring Christmas lights, and my favorite, baking Christmas cookies, an amazing weekend before Christmas and I can officially say we’re all set for Santa’s big arrival. We had a little mini baking session last week, just Mommy and her girls baking some super tasty Gluten Free Peanut Butter And Chocolate Sandies but we decided to wait for Daddy for round 2 with a family favorite, cutout cookies. But can I just say how delicious these Sandies turned out! Soft, melt in your mouth, deliciousness with my favorite peanut butter/chocolate combo. While I’d like to pat myself on the back for making these balls of holiday goodness while calming a teething baby and washing, rewashing a toddler’s sticky fingers, I have to give plenty of credit to the star of these cookies, Bob’s Red Mill Baking Flour. Thanks to them these cookies looked, felt, and tasted EXACTLY like the Christmas cookies of my childhood, only these were 100% gluten free! Christmas (10)

In years past we’ve made Christmas cookies only for Daddy and daughter, strictly off limits for Mommy. When 66% of my family was okay with gluten, my daughter being one of them, I decided it was best for the time being to stick with the gluteny cookies (also most price conscious too). Since I spend many an hour in the kitchen with my little girl by my side these days, I’ve watched just how much cross contamination is possible from her little hands to my gluten free food or gluten free cooking utensils, very scary. So to save Mommy from any possible glutening we decided the family is going partially gluten free, at least at home that is. For our baking future, we’ll be doing only gluten free baking, with only gluten free flour flying around, which gives me a little relief I have to admit.

So with our now majority gluten free house I was on a mission this year to make the best gluten free Christmas cookies. Thanks to Bob’s Red Mill our Peanut Butter Chocolate Sandies were just that, gluten free without them being obviously gluten free (hey, the stereotype can be very accurate). Now onto a Christmas staple, Gluten Free Cutout Cookies, and I’m happy to report these turned out just as delicious and pretty as they look. And did you happen to notice anything Disney? Yup, we started fresh this year with brand new cookie cutters and as a special treat to our junior baker we let her pick out her favorites. Not surprising, Disney/Christmas won!

These, along with the Sandies, are always family favorites. Rolling cookie dough into balls or making special shaped cookies that are screaming for tasty decorations, the appeal for all kids and kids at heart is kind of obvious. So with the help of miniature, freshly washed hands we mixed up the batter and started rolling, cutting, cooking, and repeat. The mixer and cutting parts were fun but a favorite by far was decorating. Daddy picked out our little girl’s favorite icings and some festive sprinkles and let her creativity take over. And even though more icing may have made it’s way into her mouth than on the cookies, the end result, these adorable Christmas cookies that were oh so festive and just screamed my little girl’s name! Christmas (7)

Thanks to Bob’s Red Mill Baking Flour, this year I’ve been able to taste some of my favorite holiday flavors from years past and share these with my very excited toddler. Baking Christmas cookies was the perfect ending to our weekend and a fantastic start to Christmas week. Now onto a week filled with last minute preparations and one more round of cookie baking, Pizzelles! Christmas

Merry Christmas to all of you! I hope this holiday is plenty merry and oh so bright for each and everyone of you!

Sincerely, 

Lindsay

Thanksgiving 2015 Catchup And A New Chapter

Does anyone else know where 2015 has gone? I mean seriously I have a toddler who’s about to turn 3, mind you I feel like she’s still a brand new 2, and a baby girl who’s quickly approaching her 6 month milestone. Where did 2015 go? Oh wait I know to a pregnancy, a birth, a Disney trip, house renovations, potty training my 2 year old, dance classes, adjusting to life with two girls, and here we are, wow it’s been a heck of a year. It is so true when other parents tell you that time passes so quickly when you have kids, I honesty feel like I blinked and this is my life. And even though it’s beyond chaotic at times, it’s my beautiful chaos and I love every second of it.

Lately I added another crazy, chaotic log to the fire by joining up with VitaMom and I’m loving it. Stay tuned to my channel on VitaMom where I’m sharing tons of my favorite mom and mom-to-be tips and tricks like fun pregnancy announcement ideas, favorite gluten free mocktails, and so much more. As far as the future of Gluten Free Mom To Be, bear with me as I find my footing as a mom of two, blogger, and now freelance writer, whew. It’s been an exhausting few months but I see a very bright future for the Gluten Free Mom To Be and I can’t wait to start a new chapter here!

So for now, I wanted to catch you up on our gluten free life over here. From Thanksgiving to my little girl’s 3rd birthday party, it’s been quite a ride the last few weeks and I’m so excited to share it with you. It was an extra special Thanksgiving around here, seeing as it was a certain baby girl’s first Thanksgiving. And even though she didn’t get to taste her first turkey she was dressed in her Thanksgiving finest and was as sweet as pie during the whole festive day, being spoiled by all of the holding for sure. 

It was truly a gluten free feast, a gluten free version of every dish, a dream come true for this mommy! I fearlessly filled my plate and enjoyed every bite. My favorites, well the turkey of course, but I also loved my dad’s mashed cauliflower and crispy stuffing, my deviled eggs, asparagus, cinnamon apples, and my chocolate angel food cake for dessert. And while Mommy and Daddy were stuffing their faces full of Thanksgiving goodness, our toddler was doing the same, shocking us all with her favorites, cranberry sauce, stuffing, and cinnamon apples. It was a wonderful day filled with delicious food and the best company. I’m looking forward to many more Thanksgivings with my new family of four! thanksgiving (1) thanksgiving (2)  

Sincerely,

Lindsay 

What’s On Your Gluten Free Menu For Thanksgiving?

Is anyone as surprised as I am that we’re only a few days away from Thanksgiving? This Fall seems to have just flown by, but I for one am super excited for all of the holiday festivities. For us the holiday family get togethers really commence with the November birthdays, these are only the start of what will be a number of family events of the season. This past weekend we rang in my dad’s belated 60th birthday and my nephew’s 8th birthday, a number I’m still having a hard time grasping. It’s like I blinked and he become an eight year old, much like how I’m in the midst of planning my daughter’s 2nd birthday party that’s rapidly approaching right behind Thanksgiving. Stay tuned to learn more about her Snow White 2nd Birthday!

For now, our holiday celebrations continue with the big Thanksgiving dinner this week. With only a few days to go, I have yet to even go buy my ingredients, so needless to say I’m not quite ready yet. This year is a bit different than the past few since we’re celebrating with my family rather than Dan’s. Unfortunately my severe cat allergy gets in the way of joining in with their fun. As much as I’m a lover of all of God’s creatures, these darn cats make it really tough by making breathing an impossible task. So needless to say in an attempt to enjoy a Thanksgiving full of clean air and breathing and free of cat dander, it’s onto my cat-free family’s house this year. But even though we’re not sharing the dinner table with Dan’s side, I’ll still try to bring a little of their family love to our table too. So do you want to see what’s in store for our gluten free, and really dairy free too thanks to my nephew, Thanksgiving dinner?

Main Dishes:

  • Turkey and Gravy
  • Gluten Free Stuffing

Sides:

  • Mashed Potatoes
  • Canned Asparagus (I love how soft the asparagus gets like this, even though I do enjoy fresh asparagus too this is a staple for our Thanksgiving dinner)
  • Mashed Cauliflower
  • Sweet Potatoes with Apples and Marshmallows
  • Coleslaw
  • Deviled Eggs
  • Cherry Jello with Whole Cherries 
  • A little surprise for Dan, his mom’s Crab Dip
  • Non-gluten free rolls

Dessert:

  • Pies galore, gluten free and non-gluten free thanks to my Dad
  • Chocolate Pudding
  • Thanks to Katz, tons of gluten free/dairy free/nut free/soy free Pumpkin Pie

So that’s what our menu is shaping up to look like so far, what about yours? Share any of your favorite gluten free family recipes, I’m always looking to add to my gluten free table!

Sincerely,

Lindsay

Oatmeal Chocolaty Raisin Gluten Free Cookies That Are Sure To Impress This Holiday Season

Not too long ago I shared with you a very special review of one of my favorite gluten free cookbooks by BabyCakes in my very first vlog! I hope you caught on to how much I love their cookbook because I do, I really do! Each one of their recipes uses a reasonable amount of gluten free ingredients that you stock up on one time and you’re good to enjoy countless recipes down the road. And just as an added bonus, they use one of my favorite gluten free all purpose flours out there, by Bob’s Red Mill.   

So with the holidays rolling around, I thought I’d remind you about their fantastic BabyCakes Covers The Classics cookbook that shares amazing allergy free cookie recipes. They share your basic cookie recipes, made special by BabyCakes of course, to some pretty special kinds that’ll surely be gobbled up by all, making it pretty tough to keep some around to put out for Santa Christmas Eve night. One of my favorites happens to be a classic cookie that I honestly haven’t tasted in my gluten free life, that’s the Oatmeal Raisin Cookie. I teasingly shared a glimpse of my special batch with you on my vlog but now today I thought I’d share the recipe with you too. Now, BabyCakes gives you the basic Oatmeal Cookie recipe but suggests a few swap outs or changes that would work too. I decided to add a little twist inspired by my all time favorite gluten free candy, Raisinets. So without further ado, I introduce you to Oatmeal Chocolaty Raisin Cookies! Baby Cakes Oatmeal Raisin Cookies (17)

Ingredients:

  • 1 3/4 cups Bob’s Red Mill All Purpose Gluten Free Flour
  • 1 cup sugar
  • 1/2 cup Gluten Free Oats (I actually used the new Plain Gluten Free Oatmeal by Chex.)
  • 1/4 cup Ground Flax Meal (I always use Bob’s Red Mill which is certified gluten free.)
  • 2 tbsp Ground Cinnamon
  • 1 1/2 tsp Xanthan Gum
  • 1 tsp Baking Soda
  • 1 tsp Salt
  • 1 cup Melted Refined Coconut Oil (Pick a gluten free variety like the one by Carrington Farms. Alternatively you can use a canola oil.)
  • 1/2 cup Unsweetened Applesauce (I like Musselman’s which states gluten free on the label.)
  • 2 tbsp Vanilla Extract (Always make sure it’s pure vanilla extract, McCormick’s is gluten free.)
  • 3/4 cup Raisins
  • 3/4 cup Milk Chocolate Chips (Hershey’s are gluten free.)

Note: Feel free to use less chocolate if you prefer just a hint of chocolaty flavor or you could get really fancy and add in Raisinets instead of the raisins and chocolate chips but this is just a slightly less sugary method. 

Directions: 

  • Preheat your oven to 325 degrees and line 2 baking sheets with parchment paper. 
  • Using a whisk, combine all of the dry ingredients into a large mixing bowl including 1 3/4 cups gluten free all purpose flour, 1 cup sugar, 1/2 cup gluten free oats, 1/4 cup flax meal, 2 tbsp cinnamon, 1 1/2 tsp xanthan gum, 1 tsp baking soda, and 1 tsp salt.  Baby Cakes Oatmeal Raisin Cookies (6)
  • Next, melt 1 cup coconut oil for measuring, which I like to do in a glass measuring cup.  Baby Cakes Oatmeal Raisin Cookies (7)
  • Add 1 cup of your melted coconut oil along with 1/2 cup applesauce and 2 tbsp vanilla to the dry mix and gently stir with a rubber spatula until a thicker dough forms. 
  • Finally, add in 3/4 cup raisins and 3/4 cup chocolate chips. If you want to make some raisin cookies without chocolate, add your raisins and mix your dough up, split your dough into two, and add just half the amount of chocolate chips to one bowl of dough.  Baby Cakes Oatmeal Raisin Cookies (9)
  • Using a tablespoon, drop the dough by spoonful onto the parchment paper covered baking sheets.  Baby Cakes Oatmeal Raisin Cookies (11)
  • Bake for about 8 minutes, turn the baking sheet 180 degrees, and bake for an additional 7 minutes until your cookies turn golden brown. Always make sure you keep an eye on your cookies and cook times. Sometimes you may have to cook a little longer or a little shorter depending on your oven. Baby Cakes Oatmeal Raisin Cookies (12)
  • Remove your baking sheets from the oven and let the cookies cool a bit on the baking sheets for about 15 minutes and enjoy! Baby Cakes Oatmeal Raisin Cookies (15)

As I’m sure we all could agree, gluten free baking in general is no easy task. It’s really tough to get just the right texture without changing the flavor for the worse. But somehow, someway BabyCakes makes gluten free baking look easy and taste perfect! And I just love that through their cookbooks we too can learn the secrets behind the tastiness of their recipes and tons of gluten free baking tips and tricks between. Thanks to their cookbooks I feel a bit more confident in my gluten free baker’s shoes, and not too afraid of unique ingredients that appear all too often in gluten free baking. So make sure you snatch up a BabyCakes cookbook for your gluten free holiday baking this year and in the meantime, try my Oatmeal Chocolaty Raisin Cookies!

Sincerely,

Lindsay

Oatmeal Chocolaty Raisin Gluten Free Cookies
Write a review
Print
Ingredients
  1. 1 3/4 cups Bob's Red Mill All Purpose Gluten Free Flour
  2. 1 cup sugar
  3. 1/2 cup Gluten Free Oats (I actually used the new Plain Gluten Free Oatmeal by Chex.)
  4. 1/4 cup Ground Flax Meal (I always use Bob's Red Mill which is certified gluten free.)
  5. 2 tbsp Ground Cinnamon
  6. 1 1/2 tsp Xanthan Gum
  7. 1 tsp Baking Soda
  8. 1 tsp Salt
  9. 1 cup Melted Refined Coconut Oil (Pick a gluten free variety like the one by Carrington Farms. Alternatively you can use a canola oil.)
  10. 1/2 cup Unsweetened Applesauce (I like Musselman's which states gluten free on the label.)
  11. 2 tbsp Vanilla Extract (Always make sure it's pure vanilla extract, McCormick's is gluten free.)
  12. 3/4 cup Raisins
  13. 3/4 cup Milk Chocolate Chips (Hershey's are gluten free.)
Instructions
  1. Preheat your oven to 325 degrees and line 2 baking sheets with parchment paper.
  2. Using a whisk, combine all of the dry ingredients into a large mixing bowl including 1 3/4 cups gluten free all purpose flour, 1 cup sugar, 1/2 cup gluten free oats, 1/4 cup flax meal, 2 tbsp cinnamon, 1 1/2 tsp xanthan gum, 1 tsp baking soda, and 1 tsp salt.
  3. Next, melt 1 cup coconut oil for measuring, which I like to do in a glass measuring cup.
  4. Add 1 cup of your melted coconut oil along with 1/2 cup applesauce and 2 tbsp vanilla to the dry mix and gently stir with a rubber spatula until a thicker dough forms.
  5. Finally, add in 3/4 cup raisins and 3/4 cup chocolate chips. If you want to make some raisin cookies without chocolate, add your raisins and mix your dough up, split your dough into two, and add just half the amount of chocolate chips to one bowl of dough.
  6. Using a tablespoon, drop the dough by spoonful onto the parchment paper covered baking sheets.
  7. Bake for about 8 minutes, turn the baking sheet 180 degrees, and bake for an additional 7 minutes until your cookies turn golden brown. Always make sure you keep an eye on your cookies and cook times. Sometimes you may have to cook a little longer or a little shorter depending on your oven.
  8. Remove your baking sheets from the oven and let the cookies cool a bit on the baking sheets for about 15 minutes and enjoy!
Adapted from BabyCakes
Gluten Free Mom To Be http://www.glutenfreemomtobe.com/

There’s Only 3 More Weeks Until Thanksgiving, Make Sure You Get Your Katz Pies Soon!

It’s hard to believe but we are only 3 weeks away from Thanksgiving. Time has literally flown by, as it always does this time of year. It seems like once October rolls around, the weeks pass so quickly, probably because the last few months of the year are loaded with birthdays and holidays in our family. November alone holds the birthdays of 3 family members and 2 friends along with Thanksgiving of course, and shortly after follows December with three more family birthdays, including my precious little angel’s, one friend’s birthday, and my favorite holiday of the year. I always feel like we’re bouncing from one party or event to another but to be honest, I just love all of the time that we spend with family that we don’t necessarily get to see everyday which is exactly why Thanksgiving ranks in my top 3 favorite holidays.

Every year about this time, the holiday decorations start rolling out in stores, Christmas music pops on here and there, and Christmas shopping commences, and I just love every bit of it. What I’m not a huge fan of though is all of the holiday dinner commercials flashing on the tv which are a constant reminder of the two big family dinners that are looming ahead of me. Don’t get me wrong, I love the family part, it’s the dinner part that worries me. Not all of my family always remembers or understands my gluten free diet so the dishes they bring are always in question but my parents, and in recent years my mother-in-law and her husband, have always been the best at accommodating, taking a lot of the worry out of at least a couple of the main dishes.

My love of cooking has definitely grown over the years, so I’m always more than happy to contribute a few dishes to the meal, especially ones that are gluten free, and when I can dairy free and egg free for my nephew to enjoy too. I always like to add a few of our family’s savory favorites that have become traditions over the years and then add in a dessert here and there. The past few years, my go to for pre-made gluten free sweets has been Katz Gluten Free. They’ve consistently delivered some fantastic items that certainly do the gluten free world justice. When I first noticed that they offer pies, I was shocked since I hadn’t seen many if any pre-made gluten free pies out there, but then I instantly thought of Thanksgiving, my dad’s favorite pie holiday, where he rolls out at least three huge, mouthwatering (non-gluten free) pies. While I’ve dabbled in gluten free pie making over the years, on a holiday like Thanksgiving where I’m also making a number of other dishes, the cost and time spent make purchasing a pre-made pie more and more appealing. So before Thanksgiving comes around this year, I wanted to give Katz’s gluten free pie a try, but if it’s anything like their other items, I knew my Thanksgiving order would soon follow.   Katz Blueberry Pie (1)  So, Katz offers a couple different varieties of gluten free pie, which also happen to be free of dairy, nut, and soy too, including apple, cherry, and blueberry. I’ve always loved blueberry pies so I figured that would be a good one to try out. Price wise, each of these pies come in a 6″ size that runs about $7.99, but remember Katz offers promotions all of the time so keep an eye out over the coming weeks for a holiday pie deal. If you need something a bit larger than a 6″/personal pie, you can either order two 6″ varieties or they also offer the apple pie in an 8″ size for $12.99. If you want to check out all of Katz Gluten Free’s pie varieties, head over to their cake/pie section on their site.    Katz Blueberry Pie (2)  Once you decide what varieties of pie you’d like to go with, go ahead and order away, but not before you peruse the rest of their site just to be sure that there’s nothing else that you might like to try for the holiday season. Gluten free sprinkle cookies anyone? Once your order is placed, it’ll be no time until it arrives; I always get my orders really quickly from Katz, but keep in mind I am relatively close to them geographically, but nonetheless I’ve always received my orders in a timely fashion. When your pies do arrive, make sure you make room in your freezer to pop these in and save them for Thanksgiving, or at least try to. To enjoy, since these pies are pre-baked, all you have to do is thaw them in the refrigerator and if you’d like, warm them for 15 minutes in the oven, which does add the homemade, pie baking smell to your house that’s very appealing this time of year.

And finally, you’re probably wondering what these pies taste like. Okay, I think I’ve kept you in suspense long enough to tell you that these are DELICIOUS! The blueberry pie filling that I tried wasn’t too sweet but was just right with blueberries scattered throughout, while the crust, well that was just perfection. The gluten free pie crust was crispy and was softened just enough by the filling, but by no stretch did it do the signature crumble apart that so many gluten free products do. Katz’s gluten free pie tasted so homey, just like my dad’s homemade pies but without the gluten. I’m certainly adding these to my holiday shopping list, and I highly suggest that you do too. Let me know what kind you end up getting and what you think! Enjoy!

Note: No pretty pie picture unfortunately because my dear husband promptly dropped the wrapped pie flat on the ground before I even had a chance to bake it, so even though the pie was still edible and delicious just the same, it didn’t look so pretty at that point. There’s always next time. 

Sincerely,

Lindsay


Gluten Free Chocolaty Eclair Cake, A Light And Sweet Treat For Your Summer Cookout

Any pastry stuffed with a cream and smothered with chocolate is my kind of dessert. Although it’s been a long time since I tasted the sweet heaven of an eclair, I’ve been so lucky to enjoy a gluten free cream puff that mimicked my favorite parts of the eclair, thanks to Wildflour Bakery/Cafe (take a peak at this gorgeous gluten free cream puff). Since my gluten free baking skills are not quite up to snuff with the professionals, I’ve yet to attempt some of my bakery favorites. But, after some searching through Google and the magic of pinterest, I’ve found a great recipe that makes a tasty substitute to the pastry form of an eclair, and with a little tweaking, the Gluten Free Chocolaty Eclair Cake has been born (Thanks to The Kitchen Is My Playground for the inspiration). 

This recipe is really genius. It’s kind of a cross between an eclair and a s’more, combining the creaminess of the eclair filling with the crunchy graham crackers that sandwich the s’more. You simply layer gluten free graham crackers, my favorites are these Honeygrams by Schar, with a vanilla pudding and light cool whip filling, and smother the top with a chocolaty topping. After setting overnight, the graham crackers absorb the deliciousness of the vanilla pudding/whipped topping filling and soften to be just like a cake! It’s truly a delicious dessert and takes only a few minutes to throw together!

Ingredients:

  • 2 3.5oz boxes of gluten free vanilla instant pudding
  • 3 cups skim milk
  • 1 8oz container light whipped topping (I used Wegmans brand which states gluten free.)
  • 16.8 oz gluten free graham crackers (I used three 5.6 oz boxes of Schar graham crackers.)
  • 16 oz jar of chocolate frosting (Pillsbury states gluten free on their label.)

Directions:

  • In a mixing bowl, combine two 3.5 oz packets of vanilla pudding mix with 3 cups skim milk.
  • Stir in one whole 8 oz container of light whipped topping. 
Light whipped topping mixed with vanilla pudding packets and skim milk.
  • In a 9″ x 13″ dish, cover the bottom with a layer of gluten free graham crackers. 
  • To the layer of graham crackers add half of the vanilla pudding/whipped topping mixture, making sure to cover the graham crackers.
Bottom layer of gluten free graham crackers topped with half of the vanilla pudding/light whipped topping filling.
  • Add another layer of graham crackers on top of the vanilla pudding/whipped topping layer. 
Second layer of gluten free graham crackers.
  • Layer remaining vanilla pudding/whipped topping mixture on top of the second layer of graham crackers.
Second layer of remaining vanilla pudding/light whipped topping filling.
  • Finish the dessert with a final layer of graham crackers. 
Top and final layer of gluten free graham crackers.
  • For the final touches, empty a 16 oz jar of chocolate frosting into a small microwavable bowl and warm for a few seconds to make it creamy.
  • Gently spread frosting across the top layer of graham crackers. You may not need the entire bowl, just use what is needed.
Finishing touches, a chocolaty frosting layer atop graham cracker and eclair-like filling.
  • Refrigerate dessert over night and enjoy!

For me, this dessert was love at first bite. It was just the right amount of filling and graham crackers, all topped with a sweet icing topping, the perfect finish. This dessert takes literally 10 minutes to throw together and a somewhat painful length of time to let everything set. My advice, put the dessert together first thing in the morning and it’ll be ready for dessert after dinner the same day, just make sure you lick the spoon of the amazing filling for a little taste. But trust me, a little patience and it’ll be worth the wait because once the pudding has set and you’ve given a chance for all of the flavors to melt together, you end up with a perfect summer dessert of cake-like graham cracker layers mixed with fluffy pudding that tastes just like an eclair filling, all smothered in a sweet chocolaty icing. So add these ingredients to your shopping list for your 4th of July cookout this weekend and whip this dessert up, you’ll definitely have some happy diners on your hands!

Happy 4th of July!

Sincerely,

Lindsay

Gluten Free Chocolaty Eclair Cake
Write a review
Print
Ingredients
  1. 2 3.5oz boxes of gluten free vanilla instant pudding
  2. 3 cups skim milk
  3. 1 8oz container light whipped topping (I used Wegmans brand which states gluten free.)
  4. 16.8 oz gluten free graham crackers (I used three 5.6 oz boxes of Schar graham crackers.)
  5. 16 oz jar of chocolate frosting (Pillsbury states gluten free on their label.)
Instructions
  1. In a mixing bowl, combine two 3.5 oz packets of vanilla pudding mix with 3 cups skim milk.
  2. Stir in one whole 8 oz container of light whipped topping.
  3. In a 9" x 13" dish, cover the bottom with a layer of gluten free graham crackers.
  4. To the layer of graham crackers add half of the vanilla pudding/whipped topping mixture, making sure to cover the graham crackers.
  5. Add another layer of graham crackers on top of the vanilla pudding/whipped topping layer.
  6. Layer remaining vanilla pudding/whipped topping mixture on top of the second layer of graham crackers.
  7. Finish the dessert with a final layer of graham crackers.
  8. For the final touches, empty a 16 oz jar of chocolate frosting into a small microwavable bowl and warm for a few seconds to make it creamy.
  9. Gently spread frosting across the top layer of graham crackers.
  10. Refrigerate dessert over night and enjoy!
Adapted from The Kitchen Is My Playground
Gluten Free Mom To Be http://www.glutenfreemomtobe.com/

Essential Gluten Free Easter Recipes That You Can Enjoy Year Round

Well, Easter 2014 went off without a hitch!!! My favorite part of course was watching my little girl experience all of the holiday traditions for the first time with big bright eyes and a smile to boot. This year was so different than last year when she was a stationary little 3 month old so we were so excited to pack our Easter full of fun and tradition. In the early AM, little one rose extra early than usual, I like to think in the anticipation of wanting to see what the Easter Bunny had brought. After being sprung from her crib she walked out of her room only to go straight for the diaper bag by her toy chest; no surprise that she literally locked eyes on Mommy’s bag that’s strictly off limits, completely overlooking the oodles and oodles of new toys and treats that the Easter Bunny had brought. After a little redirection, her eyes locked onto the mound of Easter fun that awaited her and with mouth open in shock she went straight for her brand new plush Minnie backpack from Mommy and Daddy!

With no problem, she had sorted through her Easter Basket and the toys along with it, scattering everything throughout the entire living room. Onto a quick breakfast and a little playtime and then we were off to church. A lengthy church service later and our little toddler was excited for fun with her cousins at Nanny and Pop Pop’s house! The Easter Bunny had made a stop there too, leaving lots of fun surprises for her and her five cousins. What caught my daughter’s attention there? Well that would be the eggs that we had dyed last weekend there in preparation for the Easter Bunny’s visit. She promptly dug out the dyed Easter eggs from her cousin’s baskets and brought them back to Mommy and Daddy for her to examine and play with…it’s the simple things right!!! After two quick Easter egg hunts, one at Nanny and Pop Pop’s and back at home, which I’ve now learned is probably one of her favorite activities to participate in, it was time for lunch and a much needed nap before dinner.

Being the first year that we actually hosted the holiday dinner at our home, I was so excited to create some gluten free menu items that everyone could enjoy! We usually run our holiday dinners in kind of a potluck fashion where each family member brings along a different dish. So this year, going along with tradition, my parents prepared the ham and baked beans, my grandparents brought along a potato salad, my aunt a fruit salad, and my cousin and siblings added a side dish or dessert and some of the other dinner essentials. As far as my contributions, I prepared my grandmother’s coleslaw, deviled eggs, jello jigglers for my nieces and nephews, and strawberry and vanillla chex treats that I was first introduced to by Iowa Girl Eats.

In preparation this past week for the cooking fest that was about to occur for the holiday, I was so busy running around to multiple food stores, picking up different gluten free items that I needed. Yes I did say multiple food stores, as life cannot be as simple as for my main grocery store located only 10 minutes down the road to have everything. Can you tell that this is a huge sticking point for me? Do any of you have to frequent multiple food stores to collect your favorite gluten free products? Anyway, little one and I made our way to some of my favorite gluten free havens, Wegmans, Whole Foods, and Trader Joe’s, where the aisles are much more welcoming to the gluten free shopper. Although I try to only make occasional trips to these, mainly because of their appealing gluten free selection always causing more of a small grocery shopping trip than a quick stop, unfortunately for my grocery budget this week, I also stocked up on a few other different gluten free items that hadn’t made an appearance in our house in quite awhile. Finally all stocked up and ready to go, I was ready for our Easter dinner and couldn’t be more excited for our awaiting menu. 

I must say this year, our dinner did not disappoint. We had a ton of variety for all of our diners, gluten free and non-gluten free. Take a look at some of our menu choices below and feel free to give some of the dishes a try for dinner tonight, your next cook out, or even one of the next holidays!

  • Main Dish: a Cook’s spiral ham…This one unfortunately was not gluten free. In past years it has been, but Cook’s has indicated now that although their ham is inherently gluten free, the suppliers of spices and other ingredients can alter their formulations thus changing gluten content as well. Sadly, Cook’s indicates that they cannot guarantee that their hams are 100% gluten free, which for me makes it 100% off limits. To read their gluten statement, take a look at their FAQs section on their website here. For my gluten free substitution I contemplated making my own small ham or ham steak but to be honest I was short on time and was really in the mood for a lunch meat kind of ham (not very special and holiday like, but it was tasty to me). So instead of a potential gluten run in, I ate a gluten free Black Bear Virginia Ham sandwich substitute, delicious! 
  • Gluten Free Baked Beans: This one is one of my dad’s signatures. He’s been making these ever since I can remember, definitely making them a holiday tradition. In recent years, he’s had to adapt a little and make sure all of the ingredients are allergy friendly and gluten free, but still follows the same recipe! 
Baked Beans topped with bacon.
Gluten Free Baked Beans
Write a review
Print
Prep Time
10 min
Cook Time
3 hr
Total Time
3 hr 10 min
Prep Time
10 min
Cook Time
3 hr
Total Time
3 hr 10 min
Ingredients
  1. 7 lb 2 oz can Pork and Beans (our store brand is gluten free, but choose whichever brand is gluten free that is available to you)
  2. 1/4-1/3 cup French's Mustard (gluten free)
  3. 3/4 cup Heinz Ketchup (gluten free)
  4. 1/2-3/4 cup Vermont Maid Maple Syrup (gluten free)
  5. 1 lb Bacon Ends (choose a brand that is gluten free that is available to you)
  6. Brown Sugar to dot top of baked beans
Instructions
  1. Preheat oven to 325 degrees.
  2. Spread baked beans in a 16 x 13 baking pan.
  3. Add 1/4-1/3 cup of mustard to center of beans and stir to combine. Add either amount depending on personal taste, i.e. if you love a mustard flavor go with the 1/3 cup.
  4. Place 3/4 cup of ketchup to center of beans and stir.
  5. Stir in 1/2-3/4 cup of maple syrup until all is combined with baked bean mixture. Again, add either amount depending on personal taste, i.e. if you like a sweeter baked bean than go with the 3/4 cup.
  6. Dot top with brown sugar and use a knife to swirl into bean mixture.
  7. Lay 1 lb of bacon ends evenly across the entire surface of the baked beans.
  8. Place prepared baked beans on the middle rack of your oven and bake for 3 hours or until bacon is crisp on top.
  9. Enjoy!
Gluten Free Mom To Be http://www.glutenfreemomtobe.com/
  • Gluten Free Potato Salad: This one along with my coleslaw, are family staples. We always have a potato salad and coleslaw for our holiday meals. Now that I’ve inherited the coleslaw recipe from my grandmother, I get to make that one a few more times throughout the year along with each holiday. The potato salad though is still my grandmother’s favorite and is a special treat for everyone just on holidays; she even makes sure to use gluten free ingredients for me (Love that!)! 
A family favorite thanks to our grandmother!
Gluten Free Potato Salad
Write a review
Print
Ingredients
  1. 5 lb bag of Yukon potatoes (use 1-2 potatoes per person)
  2. 4 hardboiled eggs (or more if desired)
  3. 1 cup celery (about 4 stalks; adjust this number if you prefer more celery)
  4. 1 medium yellow onion chopped
  5. Hellmann’s Mayonnaise (either regular or light, both are marked gluten free; amount varies depending on number of potatoes used)
  6. Light Sour Cream (check the label and call the company of whichever brand you choose unless it states gluten free explicitly on the label; amount varies depending on number of potatoes used)
  7. Paprika
  8. Salt to taste
Instructions
  1. Wash and clean as many Yukon potatoes as needed.
  2. Add potatoes to pot and cover with water.
  3. Bring to a boil and cook until potatoes are fork tender.
  4. While potatoes are cooking, prepare hardboiled eggs.
  5. Pour off water and leave potatoes in pot until cool enough to handle.
  6. Peel and cut potatoes into quarters or bite size pieces and add them to a large bowl.
  7. Peel and slice two of the hardboiled eggs for adding to the top of the salad and chop remaining two and mix in with the potatoes. (Feel free to adjust this if you'd like.)
  8. Chop about one cup of celery (4 stalks); this amount can vary according to personal taste, add more if you're a celery lover or less if you prefer.
  9. Mix celery in with the potatoes and eggs.
  10. Chop one medium yellow onion and combine with the potato mixture.
  11. Prepare mayonnaise and sour cream mixture, similar to the dressing used for my coleslaw, creating a 2:1 ratio of mayo to sour cream. Taste mixture, making sure there is a good balance between mayonnaise and sour cream. Prepare plenty of dressing to make sure the potato salad is nice and creamy. Amounts will vary depending upon how many potatoes you need but my best advice would be to start with a larger amount and add what is needed; don't be afraid to make more later, just make sure you taste as you go!
  12. Mix in dressing with the potato mixture, making sure all is coated and creamy. Make sure you add plenty of the mayo and sour cream mixture, as the potatoes are sure to absorb some of it and you don't want a dry potato salad.
  13. Taste and add salt as needed.
  14. Top with sliced hardboiled eggs.
  15. Dust top with paprika.
  16. The secret to this one is to use enough dressing to keep it creamy!
Gluten Free Mom To Be http://www.glutenfreemomtobe.com/
  • Gluten Free and Dairy Free Deviled Eggs: These are by far one of my favorite side dishes for holidays or everyday. They’re such a tasty little side that always remind me of family get togethers and summer cookouts, making them perfect for any dinner! Check out my recipe here for these wonderful gluten free bites that are easy to make and enjoyed by all.
Deviled eggs dusted with paprika.
  • Gluten Free Coleslaw: This a perfect combination of finely chopped cabbage, mayo, and sour cream. Just season with salt and top with paprika and you’re ready to enjoy. This year I received the stamp of approval from my grandmother, this recipe’s founding mother, making it taste just that much better. Give this one a try this summer or for any holiday dinner. Check out my gluten free coleslaw recipe here.
Gluten free coleslaw, perfect for any holiday.
  • Gluten Free and Dairy Free Pasta Salad: This year my sister-in-law treated us allergy folk as well as all the other diners to two versions of a pasta salad, only difference was the pasta used! Gluten free pasta, tomatoes, cucumbers, onions, and carrots all topped with Wish Bone Italian Dressing! Just simply cook your pasta of choice according to the box directions, chop up any type of add ins you’d like, and top with the desired amount of Wish Bone Italian Dressing (or really any gluten free dressing)! So simple, yet so delicious!
Gluten free pasta salad courtesy of my sister-in-law.
  • Gluten Free and Dairy Free Strawberry and Vanilla Chex Treats: I came upon this recipe just in time for Easter thanks to Iowa Girl Eats. Instead of making a strictly gluten free version though, I made a dairy free one as well, perfect for my little allergy ridden nephew! These are absolutely delicious with the combination of the freeze-dried strawberries and the Vanilla Chex! I’m so glad I have some leftover for my family to nibble on today!
Gluten Free and Dairy Free  Strawberry Marshmallow Treats
Gluten Free and Dairy Free Strawberry Marshmallow Treats

Gluten Free and Dairy Free Strawberry and Vanilla Chex Treats
Write a review
Print
Ingredients
  1. 4 tbsp gluten free, dairy free butter (I used Earth Balance)
  2. 10 oz bag mini marshmallows (I used my store brand)
  3. 13.5 oz box Vanilla Chex
  4. 1- 1.2 oz bag freeze-dried strawberries (I used Crunchies brand, purchased at Wegmans, and actually may try two bags next time I loved the addition so much)
Instructions
  1. Spray 9 x 13" baking dish with nonstick spray.
  2. Melt 4 tbsp butter in microwave safe bowl (about 30-60 sec)
  3. Add marshmallows, stirring them to coat with butter.
  4. Microwave for 1- 1 1/2 minutes to melt marshmallows.
  5. Add chex and freeze-dried strawberries to a large mixing bowl and combine.
  6. When marshmallows are done, stir until smooth and mix into chex and strawberry mixture.
  7. Mix until all ingredients are combined and coated evenly.
  8. Scoop sticky mixture into baking dish and use a spatula or spoon sprayed with nonstick spray to press into an even layer.
  9. Allow mixture to cool and then using a knife sprayed with nonstick cooking spray, cut into squares.
  10. Enjoy!
Adapted from Iowa Girl Eats
Gluten Free Mom To Be http://www.glutenfreemomtobe.com/
These are just some of the highlights from our Easter dinner this year! I’d love to hear what everyone else’s gluten free dinner tables looked like! 

I hope you enjoy all of these dishes as much as we did! Feel free to bring these out anytime, not just on holidays too! Happy Belated Easter!

Sincerely, 

Lindsay

Summery Gluten Free Cucumber And Tomato Salad

One of my all time favorite summer salads that we probably make a few times a week in our house is a gluten free cucumber tomato salad with an oil and vinegar dressing. It pairs so well with any meal, from barbecues to holidays, I think I’ve made it for a number of them. The best part is is that it is so simple to put together! My favorite time to make this is during the summer, when we have fresh tomatoes and cucumbers from our garden. Nothing beats using your own veggies especially incredibly ripe tomatoes…so good!!! Even if it’s not summer though, this is equally as delicious year round, and trust me we enjoy that way. For a little twist on this classic oil and vinegar dressing I like to use a roasted garlic infused red wine vinegar by Pompeian, which is gluten free. I love the flavor of garlic so anytime I can add it to a dish in a subtle way I’m eager too and this was a perfect item to do just that.

This dish is so easily gluten free and only uses four ingredients, most of which are cabinet staples in our house. For this one, I’m just going to touch on the ingredients and how to quickly throw everything together, not going into too much detail. This recipe is so flexible and can be tweaked as you need it or prefer, i.e. using as much of each ingredient as necessary for the size of your dinner party, more tomatoes than cucumbers, more of vinegar flavor than oil, etc.. So just gather as many tomatoes and cucumbers as you’d like and top them with your perfect combination of gluten free oil and vinegar!

Ingredients: 

  • Tomatoes (any size tomatoes will do)
  • Cucumbers
  • Pompeian Roasted Garlic Infused Red Wine Vinegar
  • Smart Balance Oil
  • Note: Total amounts and ratios of tomatoes to cucumbers can vary depending on your own personal preference. I like to end up with equal parts tomatoes to cucumbers so I just chop up and go from there. For my small family of three, I usually chop up a medium cucumber and two plum tomatoes/2 cups of grape tomatoes (or whatever I have on hand). 
Tomato cucumber salad ingredients.

Directions:

  • Wash and peel cucumber.
  • Cut cucumber long ways into quarters and then chop into bite-size pieces. 
  • Optional: When I have extra time to spare, I add these to a bowl, dust them with salt, and leave them for 1/2 hr to 1 hr, this allows the water to drain from the cucumbers which tend to hold a ton of water. I have to say though, this step doesn’t happen often for me so don’t worry if you are short on time, this is completely optional.
Slice cucumbers into small bite-size pieces.
Slice cucumber into small bite-size pieces.
  • Wash and chop tomatoes into bite-size pieces. I even like to cut grape tomatoes into smaller pieces, making bite-size pieces for my little one to enjoy!
Quarter grape tomatoes or cut large tomatoes into bite-size pieces.
  • Note: When making the dressing, the amount and balance of oil to vinegar is really based on your own personal taste. What I like to do is mix the dressing first and then adjust the volume once I add in the cucumbers and tomatoes.
  • Of course this is completely dependent upon how much chopped tomato and cucumber you have, but I usually start with 1/4 cup oil and then add in about half that amount of vinegar. Taste and adjust as you desire. 
  • Mix in dressing, tomatoes, and cucumbers making sure all are coated with dressing. Feel free to add more dressing if needed or desired at this point. You don’t need a ton of dressing on this salad, a little goes a long way and the veggies don’t have to be swimming in it; just as long as you mix up the salad well and all veggies have been coated with the dressing you’re good to go. 
Add enough vinegar and oil to suit your tastes.
  • I like to taste a bite to see how it all goes together. At this point you can either add more dressing or even add a little salt or garlic salt and pepper to taste.  
Perfect summery salad with a hint of garlic!

And there you have it! A light and summery salad, with only four ingredients, that you can enjoy year round! As you can tell, this recipe is incredibly flexible and can be customized to your own personal tastes, that’s the beauty of it. So file this one away in your recipe book and maybe even add it to your Easter dinner this weekend! It only takes about 10 minutes in all to make and is such a tasty addition to your meal! 

Sincerely,

Lindsay

Gluten Free Cucumber and Tomato Salad
A summery salad infused with garlic that can be enjoyed year round!
Write a review
Print
Prep Time
10 min
Total Time
10 min
Prep Time
10 min
Total Time
10 min
Ingredients
  1. Tomatoes (any size tomatoes will do)
  2. Cucumbers
  3. Pompeian Roasted Garlic Infused Red Wine Vinegar
  4. Smart Balance Oil
  5. Note: Total amounts and ratios of tomatoes to cucumbers can vary depending on your personal preference. I like to end up with equal parts tomatoes to cucumbers so I just chop up and go from there. For my small family of three, I usually chop up a medium cucumber and two plum tomatoes/2 cups of grape tomatoes (or whatever I have on hand).
Instructions
  1. Wash and peel cucumber.
  2. Cut cucumber long ways into quarters and then chop into bite-size pieces.
  3. Optional: When I have extra time to spare, I add these to a bowl, dust them with salt, and leave them for 1/2 hr to 1 hr, this allows the water to drain from the cucumbers which tend to hold a ton of water. I have to say though, this step doesn't happen often for me, so don't worry if you are short on time, this is completely optional.
  4. Wash and chop tomatoes into bite-size pieces. I even like to cut grape tomatoes into smaller pieces, making bite-size pieces for my little one to enjoy.
  5. Note: When making the dressing, the amount and balance of oil to vinegar is really based on your own personal taste. What I like to do is mix the dressing first and then adjust the volume once I add in the cucumbers and tomatoes.
  6. Of course this is completely dependent upon how much chopped tomato and cucumber you have, but I usually start with 1/4 cup oil and then add in about half that amount of vinegar. Taste and adjust as you desire.
  7. Mix in dressing, tomatoes, and cucumbers making sure all are coated with dressing. Feel free to add more dressing if needed or desired at this point. You don't need a ton of dressing on this salad, a little goes a long way and your veggies don't need to be swimming in it; so keep it light, just as long as you mix up the salad well and all veggies have been coated with the dressing you're good to go.
Gluten Free Mom To Be http://www.glutenfreemomtobe.com/

My Favorite Gluten Free Easter Dishes: Fluffy Garlicky Cheddar Biscuits

A given for any holiday meal is a side of rolls. We usually have always had Pillsbury biscuits, you know the kind you have to pop open the roll and peel them apart (that was always my favorite part)! In recent years however, much to my dismay, I haven’t been able to grab one of these fluffy delights. This year, however, is a whole different story and I’m so excited to share these Gluten Free Garlicky Cheddar Biscuits. Thanks to Betty Crocker’s Bisquick mix, which I introduced you to here not too long ago, I’m now able to make light and fluffy biscuits that are perfect for any meal, holiday or everyday. This great mix combined with Betty Crocker’s fabulous recipe, you’ll end up with delicious garlic biscuits flavored with just a hint of cheese. Make sure you pick up a box of this wonderfully versatile mix and give these biscuits a try for your Easter holiday this year! 

Ingredients:

Depending on how many people you have you can adjust the recipe accordingly. For a normal dinner for just my husband, daughter, and myself I usually half the recipe to make about 6 normal size biscuits.

  • 2 cups Bisquick Gluten Free Mix
  • 1/4 tsp garlic powder
  • 1/4 cup firm butter (Smart Balance)
  • 2/3 cup skim milk
  • 1/2 cup shredded Cheddar Jack or Cheddar cheese 
  • 3 eggs
  • 1/4 cup melted butter (Garlic Butter Topping)
  • 1/4 tsp garlic powder (Garlic Butter Topping)
Ingredients for Fluffy Gluten Free Cheddar Biscuits.

Directions: 

  • Preheat oven to 425 degrees. 
  • In a medium bowl, add 2 cups Bisquick mix and 1/4 tsp garlic powder and combine.
  • Using a fork, cut in 1/4 cup cold, firm butter until mixture has coarse crumbs throughout (this makes the biscuits fluffy), so the more crumbs the better!
  • Mix in 2/3 cup milk, 3 eggs, and 1/2 cup cup shredded cheese until you form a soft dough.
Easy batter all mixed up!
Batter all mixed up!
  • Using a tablespoon, add heaping spoonfuls to an ungreased cookie sheet. Depending on size, you’ll usually get between 10 and 12 biscuits from this amount of batter.
Biscuits ready to be cooked.
  • Bake biscuits for about 8 to 10 minutes until tops are a light golden brown. I like to touch the middle of of the biggest one to make sure the biscuit is firm and cooked all the way through.
  • For topping, add 1/4 cup butter to microwavable bowl and melt. 
  • To melted butter, mix in 1/4 tsp garlic powder. 
  • Before removing biscuits from baking sheet, brush melted garlic butter on top of the biscuits.
After 10 minutes you get lightly browned biscuits!
  • Serve biscuits warm and with butter!
Fluffy inside of biscuit.
Fluffy inside of biscuit!

These biscuits are so quick and easy to make and bake, making them a perfect addition to any holiday meal! When dinner’s ready, just pull out your favorite butter and add some to the middle of your biscuits to create a wonderfully moist center! A light butter is the perfect addition to these fluffy pillows of garlicky gluten free goodness! The best thing about these biscuits is the texture, which everyone knows can be lacking in gluten free baked goods but I assure you that that is not the case for these. These biscuits are perfectly light and fluffy and moist at the same time, just what a biscuit should be and very reminiscent of those warm and buttery gluten filled biscuits that you could get at Cracker Barrel or even in a breakfast sandwich at McDonalds. I don’t know about you but I’m definitely in the mood for a warm biscuit now. I might just have to whip up a batch of these for little one and myself, maybe for egg sandwiches? The possibilities are endless!

TIP: You can even prepare these ahead of time and heat them slightly for a few minutes at a warm setting in your oven when you’re ready to enjoy.

I shared this recipe and more here on Gluten Free Easily’s Gluten-Free Wednesdays. 

Sincerely,

Lindsay

Fluffy Gluten Free Garlicky Cheddar Biscuits
Biscuits are so quick and easy and come out perfect each time!
Write a review
Print
Prep Time
10 min
Cook Time
10 min
Total Time
20 min
Prep Time
10 min
Cook Time
10 min
Total Time
20 min
Ingredients
  1. 2 cups Bisquick Gluten Free Mix
  2. 1/4 tsp garlic powder
  3. 1/4 cup firm butter (Smart Balance)
  4. 2/3 cup skim milk
  5. 1/2 cup shredded Cheddar Jack or Cheddar cheese
  6. 3 eggs
  7. 1/4 cup melted butter (Garlic Butter Topping)
  8. 1/4 tsp garlic powder (Garlic Butter Topping)
Instructions
  1. Preheat oven to 425 degrees.
  2. In a medium bowl, add 2 cups Bisquick mix and 1/4 tsp garlic powder and combine.
  3. Using a fork, cut in 1/4 cup cold, firm butter until mixture has coarse crumbs throughout (this makes the biscuits fluffy), so the more crumbs the better!
  4. Mix in 2/3 cup milk, 3 eggs, and 1/2 cup cup shredded cheese until you form a soft dough.
  5. Using a tablespoon, add heaping spoonfuls to an ungreased cookie sheet. Depending on size, you'll usually get between 10 and 12 biscuits from this amount of batter.
  6. Bake biscuits for about 8 to 10 minutes until tops are a light golden brown. I like to touch the middle of of the biggest one to make sure the biscuit is firm and cooked all the way through.
  7. For topping, add 1/4 cup butter to microwavable bowl and melt.
  8. To melted butter, mix in 1/4 tsp garlic powder.
  9. Before removing biscuits from baking sheet, brush melted garlic butter on top of the biscuits.
  10. Serve biscuits warm and with butter!
Adapted from Betty Crocker
Gluten Free Mom To Be http://www.glutenfreemomtobe.com/


1 2