Gluten Free Recipes

Gluten Free Pork Roll, Egg, And Cheese Bagel Sandwich

With years of hopping between grocery stores just to find a loaf of bread that I could eat, I now can happily just grab a loaf of gluten free bread and toss it into the cart with the rest of my groceries on my bi-weekly trip to the store. It took awhile, but now my Shop Rite stocks a pretty wide selection of Schar gluten free products, from rolls and breads to cookies and crackers. Now when I grab my husband and daughter’s loaf of bread, all I have to do is turn around and see four or five shelves of yellow packaged products with Schar’s signature red label and a red “gluten free” plastered on them. 

schar_logo
At the beginning of my gluten free adventure, I, like many others, struggled to find just the right bread that I could eat on a daily basis. Most, if not all, of the options out there were frozen and kind of bleh, but when I came upon Schar, and found it right there on the middle of a non-refrigerated grocery store shelf, I just had to try it. A quick toast later and it was ready to enjoy and boy did I ever enjoy it. I’ve turned to Schar ever since for my sandwiches and miscellaneous bread consumption, among other sweet and salty gluten free snacks. While I’m always on the lookout for new gluten free breads, especially those that don’t require a little pre-toast before eating and might even be available in my local store, for now, I’ll stick with Schar who I know I can grab at my Shop Rite and enjoy without too much prep.

I always like to keep a pretty close eye on some of my favorite brands, just in case they release any new products. Just recently, I was clicking along on Schar’s website and came upon their very own gluten free bagels, plain and cinnamon raisin. I was elated with this news! While I’ve had great gluten free bagels from Katz and Sweet Note Bagels, neither of which have made their way into my local grocery store yet, leaving an online order as my only option for now. Since I’m an avid fan of both brands, especially Katz’s everything bagels and Sweet Note’s cinnamon raisin, this isn’t too big of a deal, but it would certainly be nice to have additional bagel options on hand at all times when you’re just in the mood for a bagel. 

For those in-a-pinch, bagel craving moments, I’ve always turned to Glutino bagels. They’re in the frozen section and a package of 4 or 5 is priced at $5.99. A quick defrost and toasting later and you have your gluten free bagel fix. Now, sitting next to Glutino in the freezer case, you can find Schar’s bagel options, coming in a pack of 4, you can get plain and cinnamon raisin varieties for only $2.99 at my Shop Rite. They’re a bit bigger than the Glutino options but very similar in taste. Just like Glutino, these taste more like a Lender’s type bagel that have a bread kind of texture. So far, I’ve enjoyed Schar’s plain bagels toasted with butter or cream cheese, both of which have been quite good, but one of my favorite uses for a gluten free bagel is a breakfast sandwich.

Schar Bagel Breakfast Sandwich

For pregnant me, one of my favorite pregnancy breakfasts was a gluten free bagel, either with butter, cream cheese, or an egg, bacon, and cheese combo, along with fruit on the side. It was substantial enough to hold me over for more than a half an hour and filled that nagging craving for one of those huge bagels from that small bagel shop around the corner from me, well kind of. At the time I only really had Glutino bagels and later on Katz varieties to choose from for my bagel craving, but now and next pregnancy I have so many to choose from, kind of exciting isn’t it.

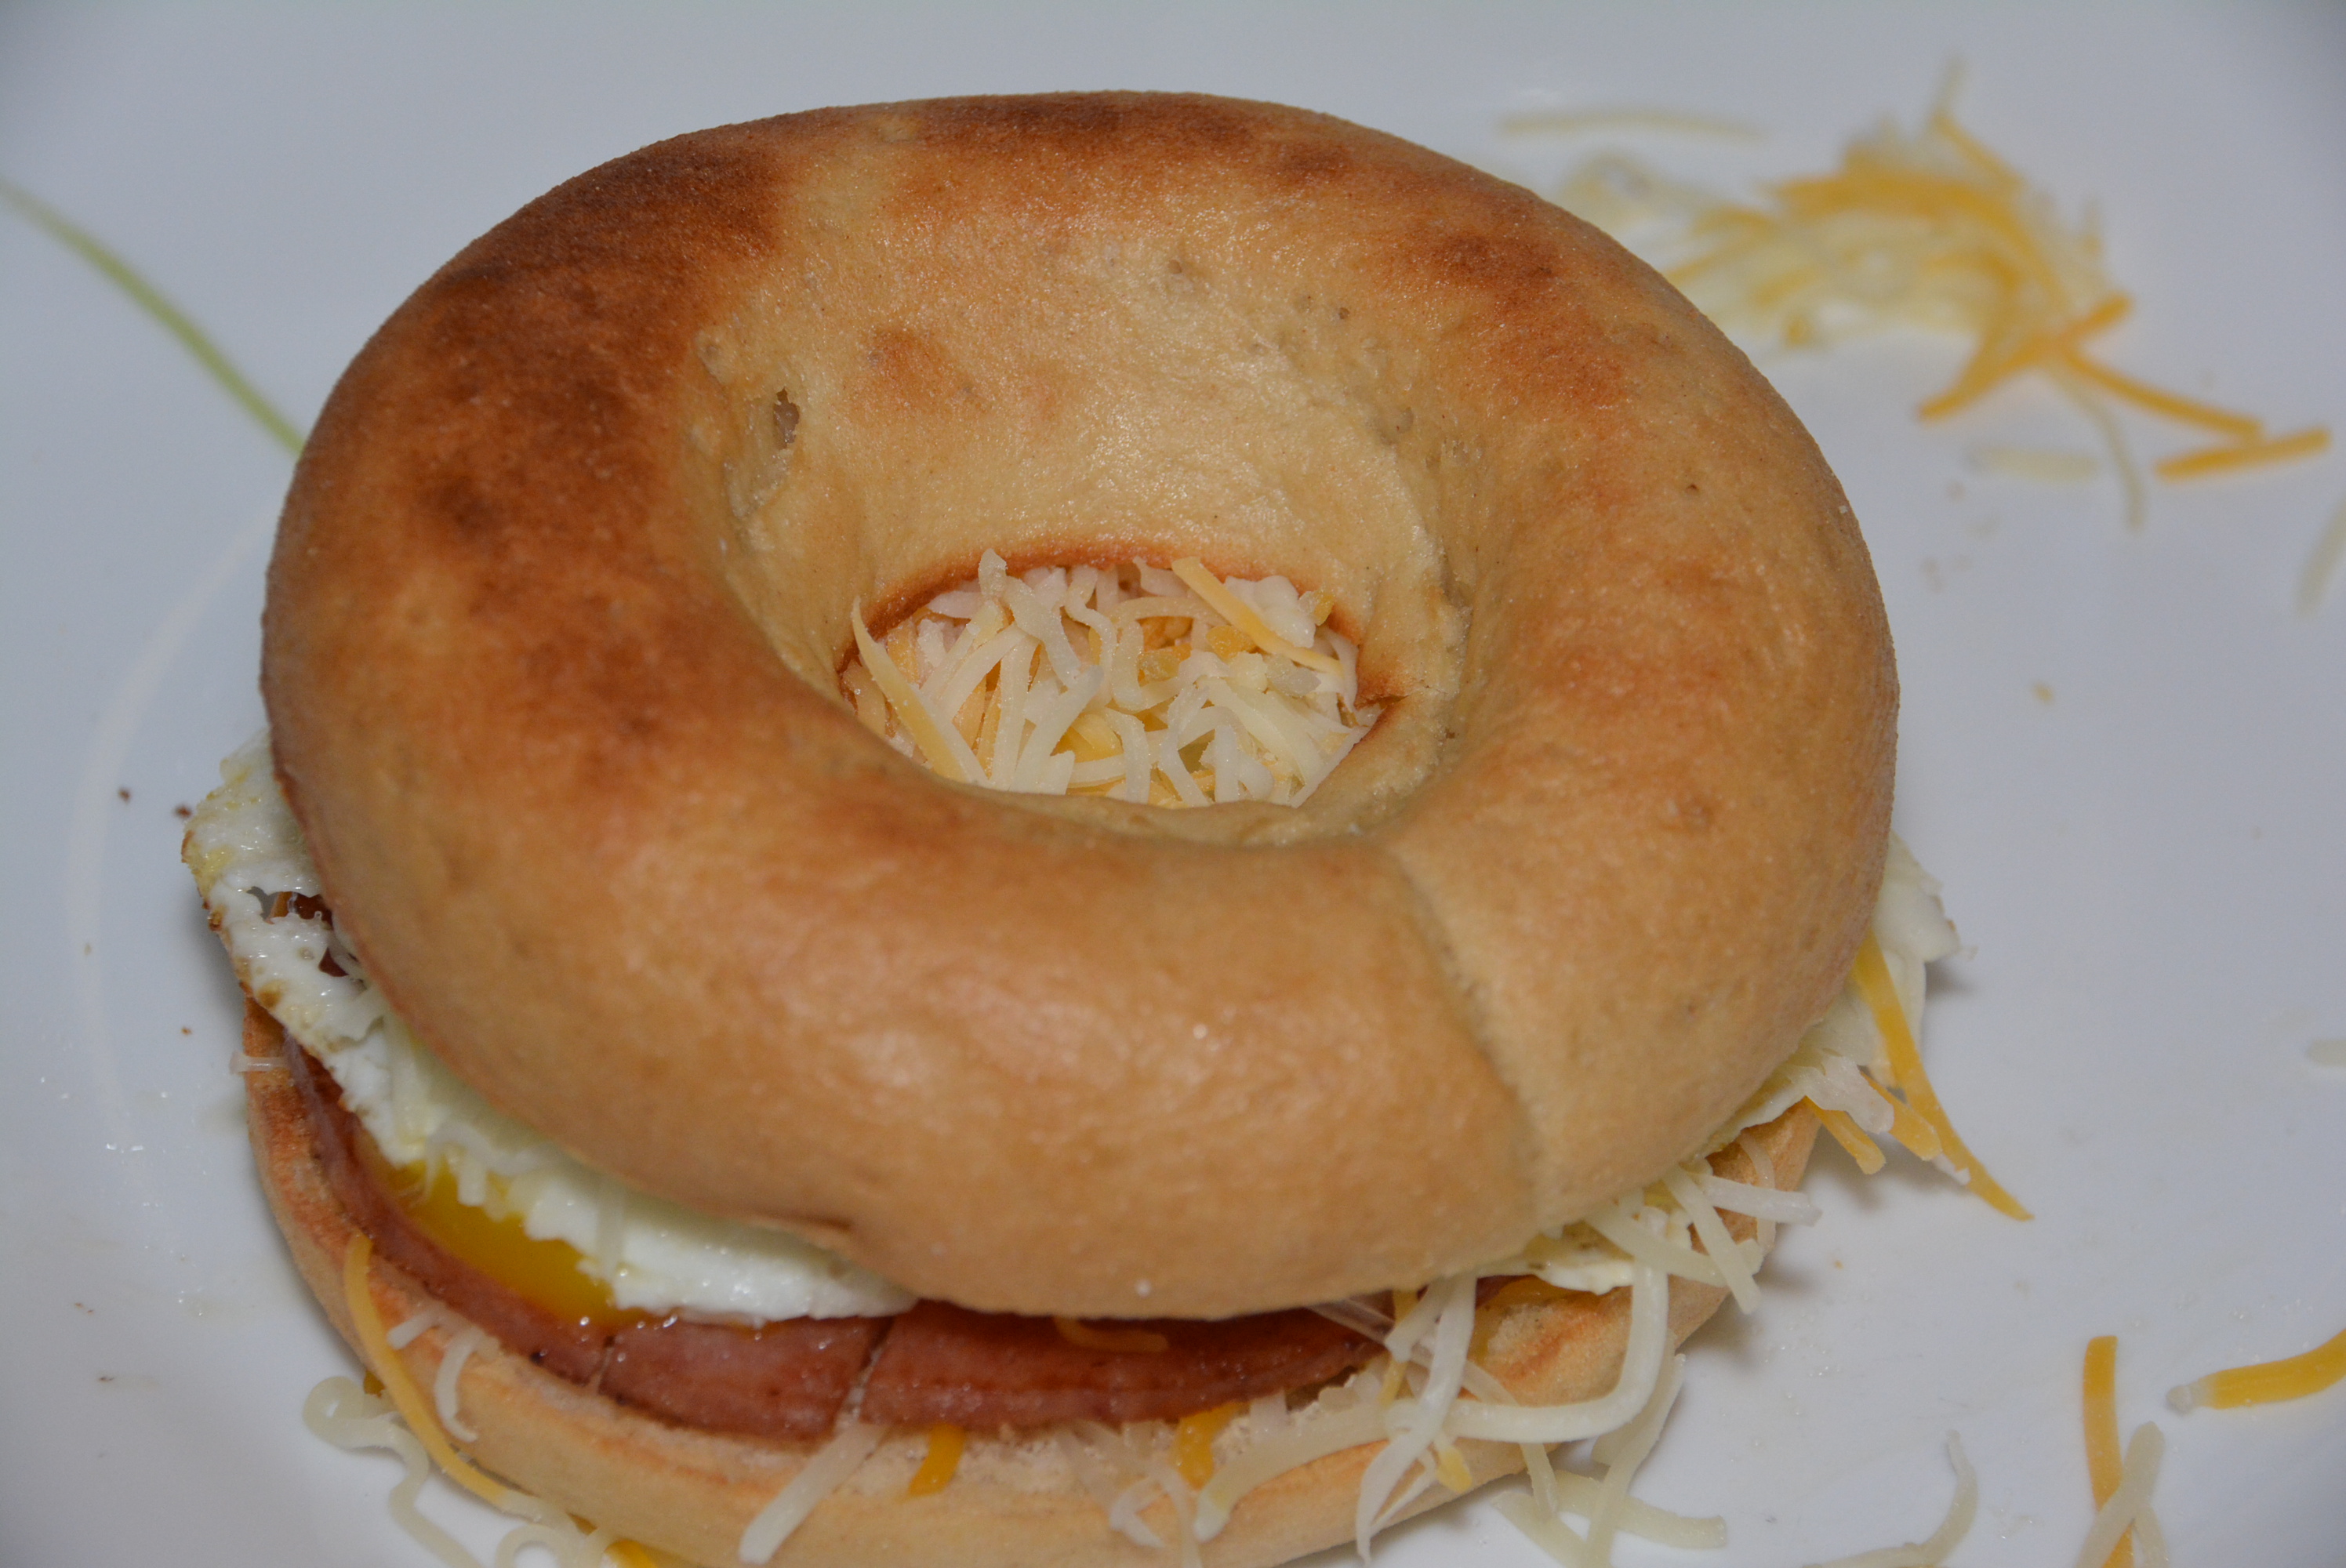
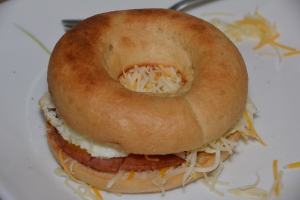
With the Schar bagels on hand, I decided the other night to do a breakfast dinner, yolky egg sandwiches with pork roll and cheese. These are so simple and tasty and really perfect on any gluten free bagel. They’re certainly a must have during a pregnancy for me, but of course with a fully cooked yolk center or just a scrambled egg instead.   

Ingredients:

  • 1 Gluten Free Bagel (I love Katz, Sweet Note Bagels, Schar, and Glutino)
  • 1-2 slices of Pork Roll, use either pre-sliced or in a roll, pre-sliced is easier (Case’s is gluten free)
  • 1 egg
  • Cheese of choice (I like American or shredded colby jack on my sandwich.)

Directions: 

  • Begin toasting your gluten free bagel.
  • While your bagel is toasting, slice your pork roll if necessary and add the slices to a warmed skillet (medium heat). The key with cooking pork roll is that you put four 1/2 inch long slits at 12:00, 3:00, 6:00, and 9:00 around the circle. As pork roll cooks it begins to puff up and the circles will buckle, so with the slits it keeps the circles lying flat.
  • Cook the pork roll a few minutes on each side, just until they brown a little. 
  • Cook your egg to your liking, making sure you have a fully cooked yolk center if you’re pregnant. 
  • When all is done cooking, just add your slice of pork roll to the base of your toasted bagel, then your egg, top with some shredded or a slice of cheese, and finally cover it all with the top of your bagel. 
  • Either let your sandwich stand for a minute to allow your cheese to melt or microwave the sandwich for a quick 10-20 seconds or so to melt the cheese. 
  • Enjoy!
Porkroll, egg, and cheese on a toasted Schar bagel.

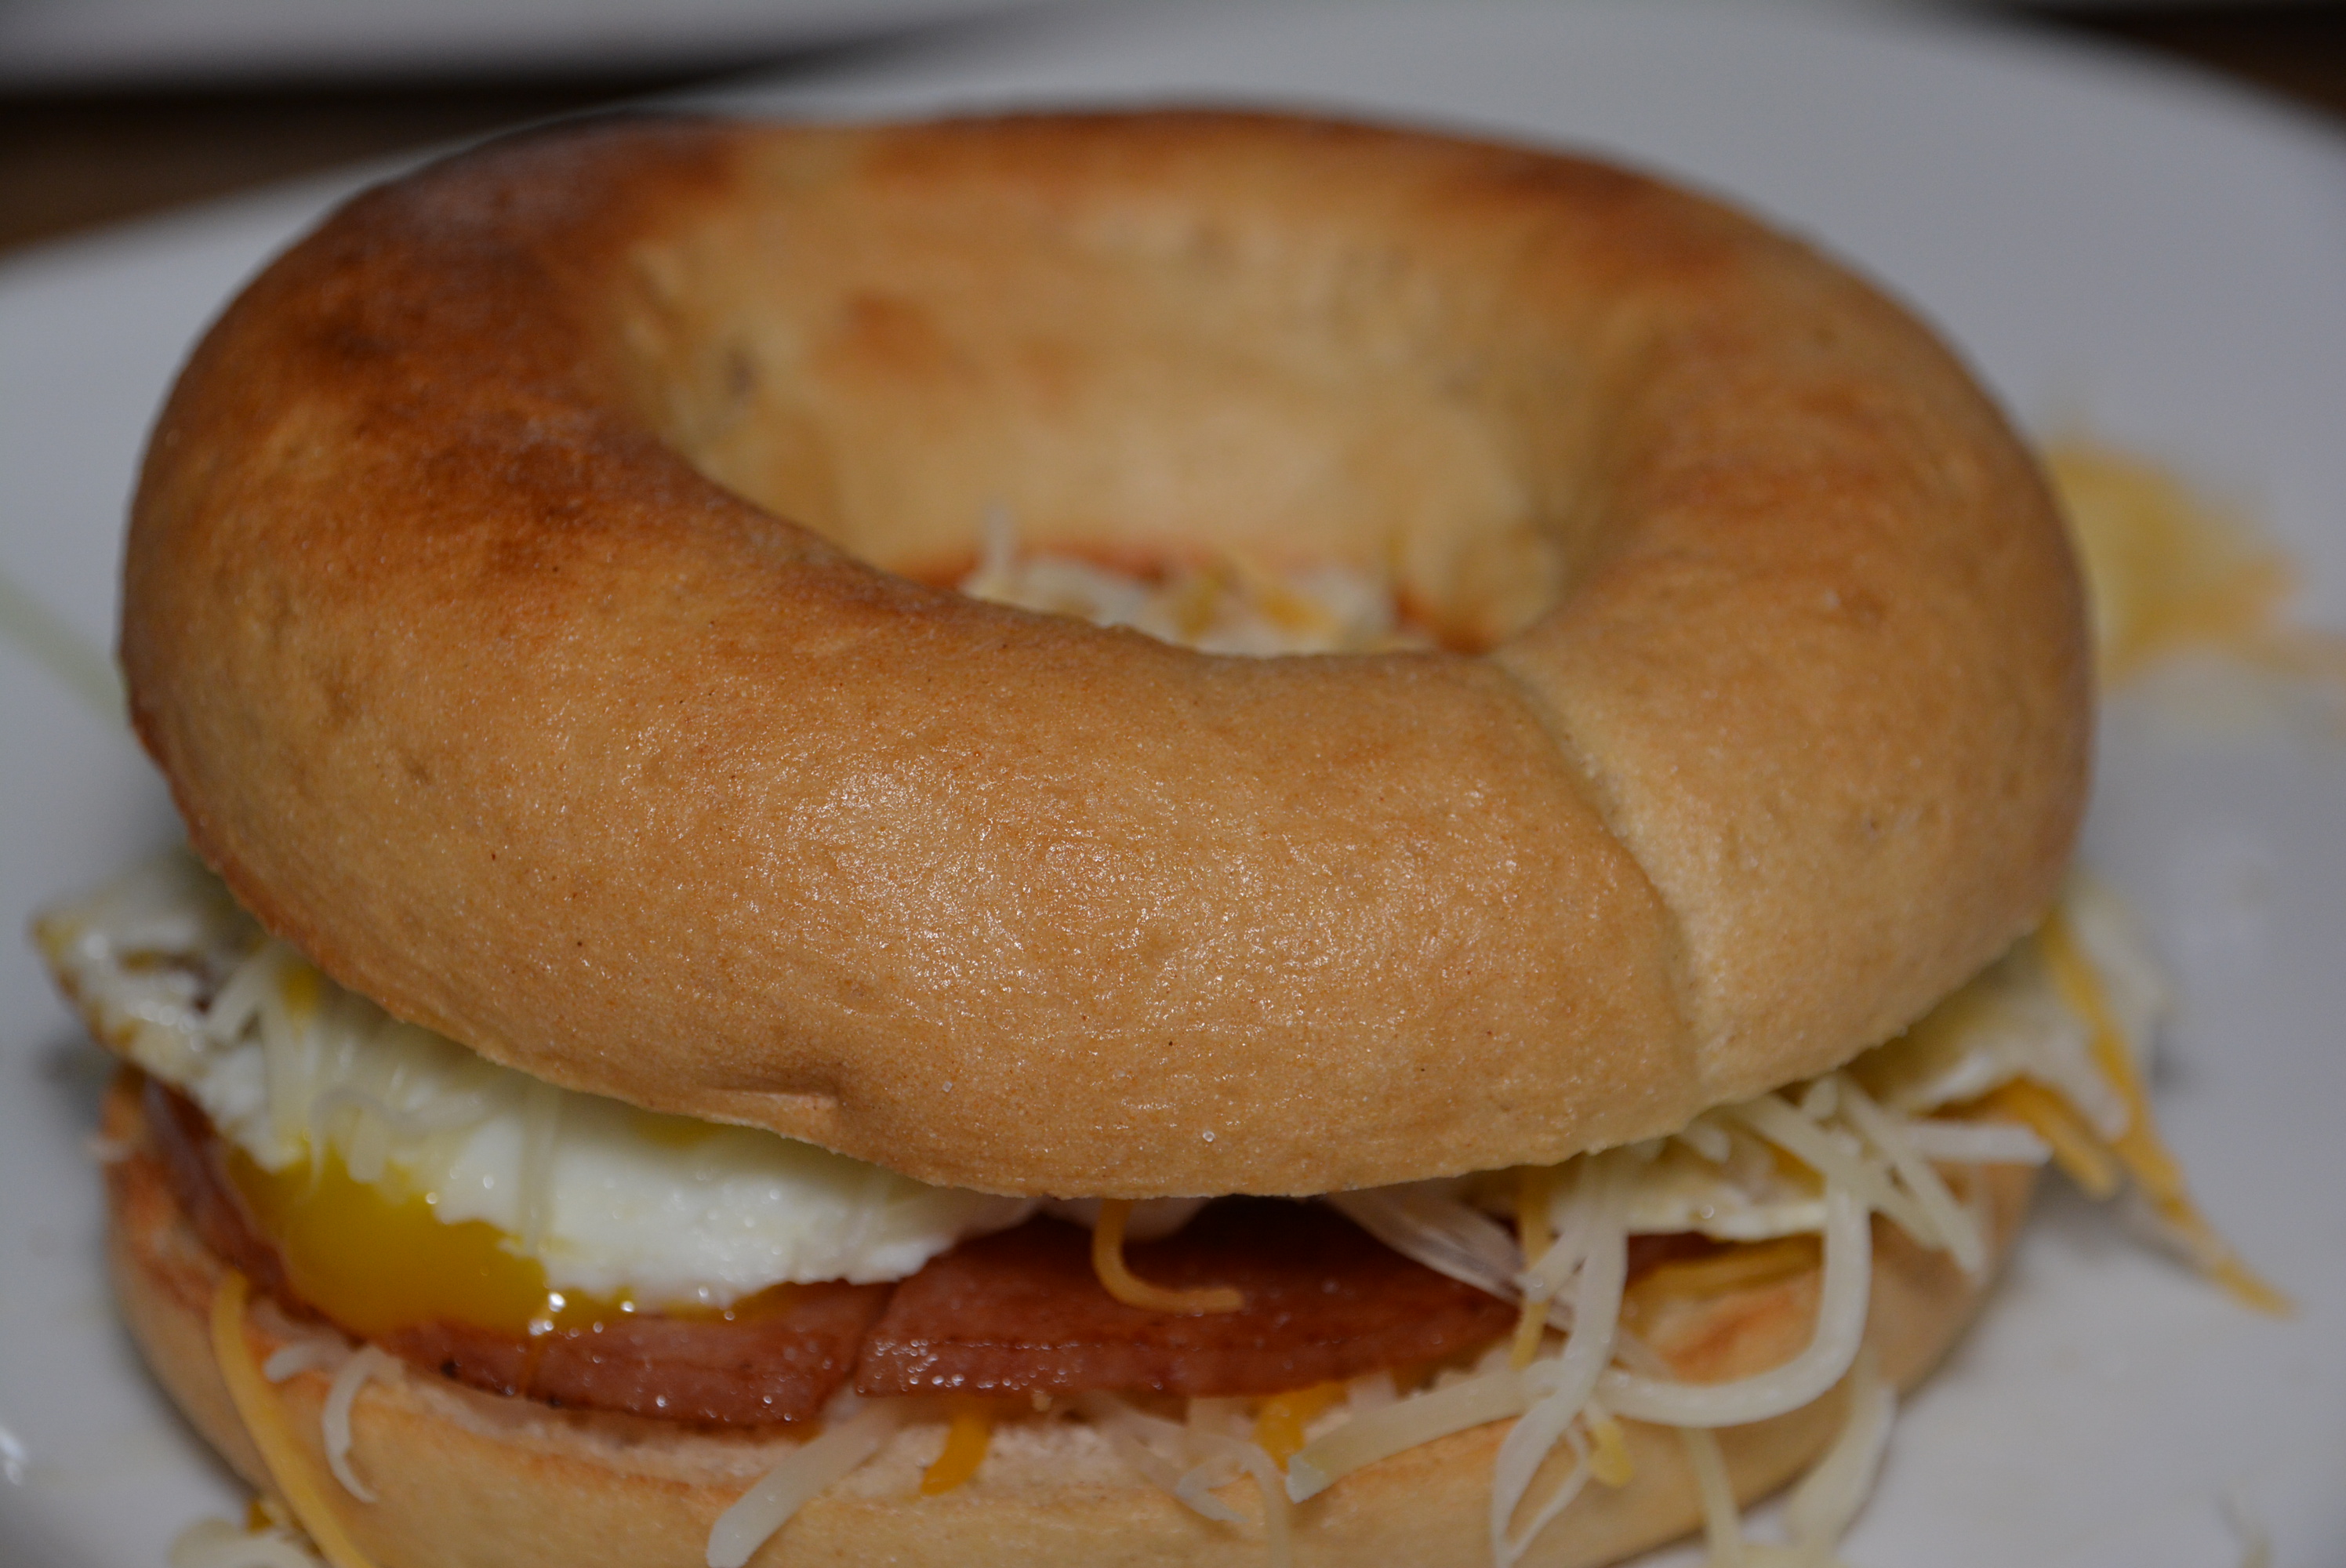
This sandwich is perfect for breakfast, lunch, or dinner. I could really eat any breakfast option at all times during the day, but especially a breakfast sandwich. The Schar bagel was a perfect size for the sandwich, large enough for the egg and pork roll to not hang over the sides. Better yet, the signature falling apart of a gluten free sandwich was non-existent with this one. From start to finish, each bite held together perfectly thanks to the fantastic Schar bagel.

You certainly can’t beat buying a pack of four gluten free bagels for $2.99, especially when they’re as big and tasty as Schar’s are. Finally, we can enjoy a regular everyday item without breaking the bank. Now, if we could only bring the price of breads down I’d be a happy camper. Thanks Schar for adding yet another great bread product to the gluten free market! Now hurry up and grab your gluten free bagel today and make one of these sandwiches, just don’t forget to send one over to me too!

Sincerely,

Lindsay 

Gluten Free Pork Roll, Egg, And Cheese Bagel Sandwich
Write a review
Print
Ingredients
  1. 1 Gluten Free Bagel (I love Katz, Sweet Note Bagels, Schar, and Glutino)
  2. 1-2 slices of Pork Roll, use either pre-sliced or in a roll, pre-sliced is easier (Case's is gluten free)
  3. 1 egg
  4. Cheese of choice (I like American or shredded colby jack on my sandwich.)
Instructions
  1. Begin toasting your gluten free bagel.
  2. While your bagel is toasting, slice your pork roll if necessary and add the slices to a warmed skillet (medium heat). The key with cooking pork roll is that you put four 1/2 inch long slits at 12:00, 3:00, 6:00, and 9:00 around the circle. As pork roll cooks it begins to puff up and the circles will buckle, so with the slits it keeps the circles lying flat.
  3. Cook the pork roll a few minutes on each side, just until they brown a little.
  4. Cook your egg to your liking, making sure you have a fully cooked yolk center if you're pregnant.
  5. When all is done cooking, just add your slice of pork roll to the base of your toasted bagel, then your egg, top with some shredded or a slice of cheese, and finally cover it all with the top of your bagel.
  6. Either let your sandwich stand for a minute to allow your cheese to melt or microwave the sandwich for a quick 10-20 seconds or so to melt the cheese.
  7. Enjoy!
Gluten Free Mom To Be http://www.glutenfreemomtobe.com/

Good Morning Gluten Free World! How About A Gluten Free Breakfast Wrap!

Ever since I made those delicious Gluten Free Chicken, Broccoli, and Cheese Quesadillas I’ve been obsessed with Udi’s tortillas. I can’t get over just how perfect their texture and taste is despite their gluten status. I mean it’s pretty hard to believe that after years of searching high and low never being able to find a delicious gluten free tortilla that Udi’s now has seemed to accomplish the impossible and make a beautifully soft flour tortilla sans gluten that tastes and feels just like the regular version! Congratulations Udi’s! (more…)

Gluten Free Chicken, Broccoli, And Cheese Quesadillas Using Udi’s Large Tortillas

Okay, so I received some samples of Udi’s new tortillas not too long ago and absolutely fell in love with them. I’ve been itching to get my hands on another package since then but haven’t had any luck finding them in my local grocery stores. Thankfully, I was wandering with little girl through one of my local health food stores the other day and spotted them, in all their gluten free glory, sitting in the freezer case. Since finding them was somewhat of a needle in a haystack scenario, I decided to snag a few packages while I had them in front of me, especially since they could be kept in the freezer for quite awhile. At $4.19 a piece they weren’t too terribly priced, but thankfully I remembered that I had Udi’s coupons sitting at the bottom of my diaper bag waiting for a moment like this to be used. And voila! Only ten minutes later and I’d saved $5 on four packages of gluten free Udi’s tortillas that were now nestled snugly in my backseat next to my little girl. Finding my favorite gluten free tortillas and saving some money on them too was a huge success for this mommy, ah the little things in life that’ll make you smile!

Well anyway, now with four packages in hand, I couldn’t wait to try out some new ways to enjoy these perfect gluten free tortillas. While I love using them to make wraps, especially my Crispy Chicken Cobb Wrap, I was really in the mood to do something warm, maybe either a panini or quesadilla. Seeing as I already had all of the ingredients for my type of quesadilla, we found a winner. Okay, so my type of quesadilla isn’t a traditional spicy version but rather it’s the perfect combo of ingredients for the Gluten Free Mom To Be. I just love the flavor and texture combination of the melted cheddar jack cheese, diced chicken, and chopped broccoli all enveloped in toasted tortillas. These are so delicious and make my mouth water just thinking about them.  

Ingredients:

  • 1 Package Large Udi’s Tortillas
  • 1 cup diced, grilled chicken (I used 1 9 oz boxes Perdue Shortcuts.)
  • 1 8 oz bag shredded cheddar jack cheese
  • 1 cup chopped broccoli
  • Butter to cook quesadilla (I used Smart Balance.)
  • Salt and pepper to taste

Directions:

  • Out of each Udi’s Large Tortilla package you’ll get 3 quesadillas so you’ll be repeating each of these steps three times.
  • Spread a thin layer of butter on one side of each tortilla, making sure you cover the entire side of the tortilla. 
Quesadilla
Udi’s large tortilla with one side buttered for cooking.
  • Warm up skillet at medium heat.
  • Add your first buttered tortilla to a warmed skillet, butter side down. Next few steps involve assembling the quesadilla which I do in the skillet. It’s much easier to quickly and carefully assemble the quesadilla in the skillet than trying to move the assembled quesadilla from plate to skillet (this gets quite messy).  
  • To the top, spread a thin layer of shredded cheddar jack cheese (I’d say about 1/4 cup).
lkjsldfj
Add buttered tortilla to a warmed skillet, followed by a thin layer of shredded cheese.
  • Add about 1/3 cup diced chicken on top of cheese layer. When I’m in a rush, I use Perdue Shortcuts, either grilled or honey flavored. They’re so simple and easy to use and taste fantastic in this dish. 
  • Next, add about 1/3 cup chopped broccoli across chicken and cheese, making sure to spread evenly.
khlh
Layer diced chicken and chopped broccoli on top of tortilla and cheese. 
  • Toss a little more shredded cheese on top of the fillings, just to help the second tortilla stick. 
  • Season fillings with a little salt and pepper if you wish and then top them with the second tortilla, butter side facing up.
  • After only about 2-3 minutes of cooking on first side, using a spatula, carefully lift the bottom layer up to make sure it’s golden brown. 
  • Once the bottom tortilla has turned golden brown, using a large spatula carefully flip the quesadilla over so the uncooked, buttered tortilla is now face down on the skillet and the browned tortilla is face up. 
khkjh
Carefully flip your quesadilla so the cooked side is up and uncooked buttered tortilla is down on the skillet. 
  • After an additional 2-3 minutes cooking on the second side, carefully scoop out quesadilla and add it to a plate.
  • Using a pizza cutter, cut your quesadilla into as many slices as you prefer.
  • Repeat assembly and cooking steps for remaining tortillas and you’ll end up with three large portions of delicious and gluten free chicken, cheese, and broccoli quesadillas! 
ljlkj
Yummy! It’s making my mouth water just looking at this picture.

These quesadillas are a quick and tasty dinner, lunch, or even appetizer for a dinner party! They’re a different take on your traditional zesty quesadillas and satisfy even the pickiest diners. If you have non-gluten free diners in your family just split this recipe between gluten free and non-gluten free tortillas. For our family, I prepared one gluten free quesadilla for myself and two non-gluten free quesadillas for my husband and daughter. As always be careful of cross contamination, but what I like to do is prep all of the ingredients first and then make my gluten free quesadilla before I even take out the non-gluten free tortillas. Also, a little tip about minimizing your dirty dishes, just reuse your skillet between quesadillas. I make mine first so I don’t share a cook top, which is a big cross contamination no no, and then assemble and make the regular quesadillas in the same skillet afterwards.

So grab your favorite gluten free tortillas, I highly recommend Udi’s brand, and put these quesadillas together as soon as possible! I for one am so glad that I came upon these tortillas, as they’re by far the best gluten free tortillas that I’ve yet to experience. I certainly can see many a gluten free wrap and quesadilla in my future, especially during a future pregnancy. What a great pregnancy snack or meal!

Sincerely,

Lindsay

Gluten Free Chicken, Broccoli, And Cheese Quesadillas
Write a review
Print
Ingredients
  1. 1 Package Large Udi's Tortillas
  2. 1 cup diced, grilled chicken (I used 1 9 oz boxes Perdue Shortcuts.)
  3. 1 8 oz bag shredded cheddar jack cheese
  4. 1 cup chopped broccoli
  5. Butter to cook quesadilla (I used Smart Balance.)
  6. Salt and pepper to taste
Instructions
  1. Out of each Udi's Large Tortilla package you'll get 3 quesadillas so you'll be repeating each of these steps three times.
  2. Spread a thin layer of butter on one side of each tortilla, making sure you cover the entire side of the tortilla.
  3. Warm up skillet at medium heat.
  4. Add your first buttered tortilla to a warmed skillet, butter side down. Next few steps involve assembling the quesadilla which I do in the skillet. It's much easier to quickly and carefully assemble the quesadilla in the skillet than trying to move the assembled quesadilla from plate to skillet (this gets quite messy).
  5. To the skillet tortilla, spread a thin layer of shredded cheddar jack cheese (I'd say about 1/4 cup).
  6. Add about 1/3 cup diced chicken on top of cheese layer. When I'm in a rush, I use Perdue Shortcuts, either grilled or honey flavored. They're so simple and easy to use and taste fantastic in this dish.
  7. Next, add about 1/3 cup chopped broccoli across chicken and cheese, making sure to spread evenly.
  8. Toss a little more shredded cheese on top of the fillings, just to help the second tortilla stick.
  9. Season fillings with a little salt and pepper if you wish and then top them with the second tortilla, butter side facing up.
  10. After only about 2-3 minutes of cooking on first side, using a spatula, carefully lift the bottom layer up to make sure it's golden brown.
  11. Once the bottom tortilla has turned golden brown, using a large spatula carefully flip the quesadilla over so the uncooked, buttered tortilla is now face down on the skillet and the browned tortilla is face up.
  12. After an additional 2-3 minutes cooking on the second side, carefully scoop out quesadilla and add it to a plate.
  13. Using a pizza cutter, cut your quesadilla into as many slices as you'd like.
  14. Repeat assembly and cooking steps for remaining tortillas and you'll end up with three portions of delicious and gluten free chicken, cheese, and broccoli quesadillas!
Gluten Free Mom To Be http://www.glutenfreemomtobe.com/

Gluten Free Cheeseburger Pasta Skillet Dinner: A Family Favorite!

Growing up I’ve never been part of the burger loving group, always more of a hot dog kind of girl. I was simple, a plain hot dog on a fluffy bun and I was all set, and maybe if I was feeling extra adventurous that day I’d add a smidge of yellow mustard but that was rare. After years have passed and I met my husband, my tastes have changed a tad and I’m a bit more willing to try different things. Thank goodness I did too because it turns out that I love my husband’s burgers! He mixes in seasoned salt and worcestershire sauce and makes our burgers more meatball shaped so they keep their juice! Some things don’t really change though, I usually like to keep things simple when I’m topping my burger, just adding some cheese and dill pickles.

Since developing a liking for burgers, this recipe for Cheeseburger Pasta definitely caught my attention. Combining yummy cheesy burger with gluten free pasta cooked perfectly seemed like an amazing idea. Using the base recipe in a Taste of Home magazine, I just tweaked it a little to be gluten free and make it more Gluten Free Mom To Be. It was so simple, and besides the pot to boil your gluten free pasta in, it only required one skillet to throw everything together. Flavor wise, this recipe was amazing, even for a simple girl like myself who admittedly doesn’t like many of these ingredients individually, but together they make magic happen and may have dialed up my adventurous side a little bit more. We loved loved loved this recipe and it goes perfectly with both my gluten free pasta and my daughter and husband’s regular pasta. So pick out your favorite gluten free pasta (I prefer Barilla or Ronzoni) and mix in some cheeseburger ingredient staples and you have one delectable Gluten Free Cheeseburger Pasta Skillet Dinner, a family favorite for sure!

Ingredients:

  • 1 3/4 cups uncooked, gluten free elbow macaroni
  • 3/4 lb lean ground beef (I usually use 85% or higher if available)
  • 2 tbsp finely chopped yellow onion
  • 1 can (14 1/2 ounces) no-salt-added diced tomatoes (Tuttorosso states gluten free on their packaging)
  • 2 tbsp dill pickle relish (Heinz is gluten free)
  • 2 tbsp prepared yellow mustard (French’s yellow mustard states gluten free on their website)
  • 2 tbsp ketchup (Heinz is gluten free)
  • 1 tsp steak seasoning (Use your favorite gluten free steak seasoning.)
  • 1/4 tsp seasoned salt (I use Lawry’s)
  • 3/4 cup shredded reduced fat cheddar cheese

Directions:

  • Cook pasta according to package directions.
  • Once pasta starts cooking, add 3/4 lb lean ground beef and 2 tbsp finely chopped yellow onion into a large skillet and brown over medium heat (cook until meat is no longer pink).
Brown ground beef and onions in skillet.
  • Drain liquid off meat and onion mixture
  • Once pasta is done cooking, drain and add to the cooked meat and onion mixture in the skillet. (You can add the pasta before you add the additional ingredients as instructed at this step or after; when I made it this time I added in the pasta after I mixed in the other ingredients with the meat and onions and it came out just as tasty.)
  • Continue to heat and mix in one 14 1/2 ounce can diced tomatoes, 2 tbsp dill pickle relish, 2 tbsp yellow mustard, 2 tbsp ketchup, 1 tsp steak seasoning, and 1/4 tsp seasoned salt.
Add in seasonings, mustard, ketchup, and relish to beef and onions.
  • Bring mixture to a boil.
  • Reduce heat and simmer uncovered for 5 minutes.
Simmer mixture
Simmer mixture uncovered for 5 minutes.
  • Remove skillet from heat and sprinkle 3/4 cup shredded, reduced fat cheddar cheese.
Top skillet dish with shredded cheese.
  • Cover skillet and let it stand until cheese is melted.
My mouth waters every time I think about this dish.
  • Serve and enjoy!

The best part for me about cooking and baking are the smells that fill your house. I love walking through and sniffing in the sweetness of a batch of cookies or a cake or the mouthwatering savory flavors in this Cheeseburger Pasta dish. Every time I make this one, my husband comes in after work, takes a deep breath, and immediately draws a huge smile across his face, while running into the kitchen to catch a sneak peak before he even puts his stuff down. My Gluten Free Cheeseburger Pasta Skillet Dinner is definitely a winner in our book in all categories, from smell and presentation to the most important category of taste. It definitely gives you all of the flavors of a big cheeseburger but with the twist of some gluten free pasta mixed in. Add this dish to your weekly meal plan for sure, as your family will definitely be glad that you did!  

TIP: If you’re making this dinner for both gluten free and non-gluten free family members as I usually do it’s really simple to split the recipe down the middle and make two separate portions safely. I usually boil up the two different kinds of pastas in their respective pots, and meanwhile I prepare the ground beef mixed with all of the other ingredients first. After the pasta has finished cooking, I just drain the water and divide the Cheeseburger components in the skillet in half between the two pots of pasta, and there you go, Gluten Free and Non- Gluten Free Cheeseburger Pasta Skillet Dinner!

Sincerely,

Lindsay

Gluten Free Cheeseburger Pasta Skillet Dinner
Write a review
Print
Ingredients
  1. 1 3/4 cups uncooked, gluten free elbow macaroni
  2. 3/4 lb lean ground beef (I usually use 85% or higher if available)
  3. 2 tbsp finely chopped yellow onion
  4. 1 can (14 1/2 ounces) no-salt-added diced tomatoes (Tuttorosso states gluten free on their packaging)
  5. 2 tbsp dill pickle relish (Heinz is gluten free)
  6. 2 tbsp prepared yellow mustard (French's yellow mustard states gluten free on their website)
  7. 2 tbsp ketchup (Heinz is gluten free)
  8. 1 tsp steak seasoning (Use your favorite gluten free steak seasoning.)
  9. 1/4 tsp seasoned salt (I use Lawry's)
  10. 3/4 cup shredded reduced fat cheddar cheese
Instructions
  1. Cook pasta according to package directions.
  2. Once pasta starts cooking, add 3/4 lb lean ground beef and 2 tbsp finely chopped yellow onion into a large skillet and brown over medium heat (cook until meat is no longer pink).
  3. Drain liquid off meat and onion mixture
  4. Once pasta is done cooking, drain and add to the cooked meat and onion mixture in the skillet. (You can add the pasta before you add the additional ingredients as instructed at this step or after; when I made it this time I added in the pasta after I mixed in the other ingredients with the meat and onions and it came out just as tasty.)
  5. Continue to heat and mix in one 14 1/2 ounce can diced tomatoes, 2 tbsp dill pickle relish, 2 tbsp yellow mustard, 2 tbsp ketchup, 1 tsp steak seasoning, and 1/4 tsp seasoned salt.
  6. Bring mixture to a boil.
  7. Reduce heat and simmer uncovered for 5 minutes.
  8. Remove skillet from heat and sprinkle 3/4 cup shredded, reduced fat cheddar cheese.
  9. Cover skillet and let it stand until cheese is melted.
  10. Serve and enjoy!
Adapted from Taste of Home
Gluten Free Mom To Be http://www.glutenfreemomtobe.com/


How About Dinner In? Try This Gluten Free Chicken And Green Veggie Stir Fry!

Mmmm I just love Chinese food. Okay so not really all Chinese food but really just my absolute favorite dishes that I always ordered, which were lomein and chicken with broccoli. I LOVED lomein with veggies, the noodles were just perfection, flavored with just the right amount of a beautiful soy sauce. Over the years my family and I enjoyed Chinese food here and there, and after meeting my husband the tradition continued. Unfortunately after our first three years together, the tradition had come to an end, at least the part where we could order from our favorite local Chinese food restaurant right around the corner. On the brighter side though, we discovered P.F. Chang’s, a fantastic Chinese food chain that offers some really great gluten free alternatives to your traditional Chinese food dishes. Our enjoyment of this cuisine thankfully didn’t end with my diagnosis, in fact I’ve enjoyed many a Chinese food night safely thanks to P.F. Chang’s. Stay tuned for for a sneak peak at some of my favorite gluten free eats at this chain.

Thank goodness there is a restaurant that offers gluten free Asian cuisine, but many a night we’re just not in the mood to eat out or make the longer trek out to P.F. Chang’s. Thankfully, a few brands have released gluten free versions of their soy sauces so we can enjoy a little gluten free, Chinese inspired concoction at home. I’ve dabbled a bit with these gluten free soy sauces, with my favorite being Kikkoman, but haven’t quite mastered Asian cooking yet. Thanks to my Dad, who is always on the hunt for new recipes to try for my mom, he stumbled upon a stir fry in one of their diabetic magazines. After tweaking some of the ingredients in the sauce to be gluten free friendly and mixing in my two favorite veggies with chicken I made my Gluten Free Chicken And Green Veggie Stir Fry. The chicken is so flavorful thanks to the gluten free soy sauce, and the extra thin green beans and broccoli are just as spectacular and by far the favorites for my veggie loving little girl. Just like my little one, I too love this recipe, it’s so quick and tasty, a perfect dinner for those busy summer days and freezing cold winter nights. So when you’re not in the mood to eat out for your favorite Chinese food, why not make this stir fry and dine in.

Ingredients:

  • 12 oz skinless, boneless chicken breasts (Cut these into small bite size pieces or thin slices,)
  • 2 tsp freshly grated ginger
  • 1 heaping tbsp minced garlic
  • 1 cup extra thin frozen green beans (My family loves these so we always keep a bag from Wegmans.)
  • 1 cup frozen broccoli
  • 1/2 cup thinly sliced green onions
  • Vegetable oil (I use Smart Balance.)

     Sauce:

  • 1/3 cup cold water
  • 2 tbsp gluten free soy sauce (I like Kikkoman. (I prefer to use reduced sodium however I’ve found it’s a bit difficult to find one in a gluten free variety.))
  • 1 tbsp reduced sodium chicken broth (I use Progresso which marks gluten free on their packaging.)
  • 2 tsp cornstarch

Directions:

  • Trim and slice 12 oz chicken breasts into thin strips or bite size pieces. Set aside for cooking shortly.
  • Next, stir together sauce ingredients by first combining 1/3 cup cold water and 2 tsp cornstarch. Then stir in 2 tbsp gluten free soy sauce and 1 tbsp reduced sodium chicken broth. Set prepared sauce aside to add in at the end.
  • Heat a large skillet over medium-high heat and add a little bit of vegetable oil to lightly coat bottom of skillet.
  • Add 1 heaping tbsp minced garlic and 2 tsp freshly grated ginger to skillet and saute for about 30 seconds (garlic will barely begin to brown).
  • Then add 1 cup each of frozen broccoli and extra thin green beans to skillet with garlic and stir fry for about 6-8 minutes or until veggies are soft and tender.
  • Remove cooked veggies from skillet and add to bowl, set aside. 
  • To warmed skillet, add chicken strips/pieces and cook on medium-high heat for about 2-4 minutes or until chicken is cooked through.
  • Once chicken is cooked, stir soy sauce mixture and add to skillet. Stir to coat chicken with sauce and cook until sauce has thickened and bubbles.
  • Add green veggies back into skillet, mix with sauce and chicken, and heat for an additional minute or two until all components are warmed and flavors have combined.
  • Thinly slice 1/2 cup green onions and sprinkle on top of stir fry or mix in. 
Gluten Free Chicken & Green Veggie Stir Fry
  • Empty stir fry ingredients into serving dish or serve in skillet. 
  • Enjoy!
A shot of this deliciousness up close!

This was one of my favorite dishes to make this past winter, since it was quite a doozy in my neck of the woods. With frozen veggies up the wazoo in our freezer and a stockpile of chicken to boot, it was so easy to throw them together in this quick and tasty stir fry. With the extra thin green beans still having a little crunch to them and the broccoli scattered throughout, each bite was the perfect ratio of tender veggies and flavorful chicken. Not to mention the amazing sauce and minced garlic that coats it all, delicious!

Now that summer is here, this being one of my daughter’s favorite dishes, it still makes a frequent appearance in our house with either fresh or frozen veggies; honestly, I usually just throw in whatever veggies I have on hand at the time, whether they are fresh or frozen, either way they’re equally as healthy. So feel free to combine your two favorite fresh or frozen veggies and put this dish together. Just make sure you cook all of your veggies to become nice and tender before adding in your chicken and sauce and enjoy!

Sincerely,

Lindsay

Gluten Free Chicken And Green Veggie Stir Fry
Write a review
Print
Ingredients
  1. 12 oz skinless, boneless chicken breasts (Cut these into small bite size pieces or thin slices,)
  2. 2 tsp freshly grated ginger
  3. 1 heaping tbsp minced garlic
  4. 1 cup extra thin frozen green beans (My family loves these so we always keep a bag from Wegmans.)
  5. 1 cup frozen broccoli
  6. 1/2 cup thinly sliced green onions
  7. Vegetable oil (I use Smart Balance.)
Sauce
  1. 1/3 cup cold water
  2. 2 tbsp gluten free soy sauce (I like Kikkoman. (I prefer to use reduced sodium however I've found it's a bit difficult to find one in a gluten free variety.))
  3. 1 tbsp reduced sodium chicken broth (I use Progresso which marks gluten free on their packaging.)
  4. 2 tsp cornstarch
Instructions
  1. Trim and slice 12 oz chicken breasts into thin strips or bite size pieces. Set aside for cooking shortly.
  2. Next, stir together sauce ingredients by first combining 1/3 cup cold water and 2 tsp cornstarch. Then stir in 2 tbsp gluten free soy sauce and 1 tbsp reduced sodium chicken broth. Set prepared sauce aside to add in at the end.
  3. Heat a large skillet over medium-high heat and add a little bit of vegetable oil to lightly coat bottom of skillet.
  4. Add 1 heaping tbsp minced garlic and 2 tsp freshly grated ginger to skillet and saute for about 30 seconds (garlic will barely begin to brown).
  5. Then add 1 cup each of frozen broccoli and extra thin green beans to skillet with garlic and stir fry for about 6-8 minutes or until veggies are soft and tender.
  6. Remove cooked veggies from skillet and add to bowl, set aside.
  7. To warmed skillet, add chicken strips/pieces and cook on medium-high heat for about 2-4 minutes or until chicken is cooked through.
  8. Once chicken is cooked, stir soy sauce mixture and add to skillet. Stir to coat chicken with sauce and cook until sauce has thickened and bubbles.
  9. Add green veggies back into skillet, mix with sauce and chicken, and heat for an additional minute or two until all components are warmed and flavors have combined.
  10. Thinly slice 1/2 cup green onions and sprinkle on top of stir fry or mix in.
  11. Empty stir fry ingredients into serving dish or serve in skillet.
  12. Enjoy!
Gluten Free Mom To Be http://www.glutenfreemomtobe.com/

Gluten Free Chocolaty Eclair Cake, A Light And Sweet Treat For Your Summer Cookout

Any pastry stuffed with a cream and smothered with chocolate is my kind of dessert. Although it’s been a long time since I tasted the sweet heaven of an eclair, I’ve been so lucky to enjoy a gluten free cream puff that mimicked my favorite parts of the eclair, thanks to Wildflour Bakery/Cafe (take a peak at this gorgeous gluten free cream puff). Since my gluten free baking skills are not quite up to snuff with the professionals, I’ve yet to attempt some of my bakery favorites. But, after some searching through Google and the magic of pinterest, I’ve found a great recipe that makes a tasty substitute to the pastry form of an eclair, and with a little tweaking, the Gluten Free Chocolaty Eclair Cake has been born (Thanks to The Kitchen Is My Playground for the inspiration). 

This recipe is really genius. It’s kind of a cross between an eclair and a s’more, combining the creaminess of the eclair filling with the crunchy graham crackers that sandwich the s’more. You simply layer gluten free graham crackers, my favorites are these Honeygrams by Schar, with a vanilla pudding and light cool whip filling, and smother the top with a chocolaty topping. After setting overnight, the graham crackers absorb the deliciousness of the vanilla pudding/whipped topping filling and soften to be just like a cake! It’s truly a delicious dessert and takes only a few minutes to throw together!

Ingredients:

  • 2 3.5oz boxes of gluten free vanilla instant pudding
  • 3 cups skim milk
  • 1 8oz container light whipped topping (I used Wegmans brand which states gluten free.)
  • 16.8 oz gluten free graham crackers (I used three 5.6 oz boxes of Schar graham crackers.)
  • 16 oz jar of chocolate frosting (Pillsbury states gluten free on their label.)

Directions:

  • In a mixing bowl, combine two 3.5 oz packets of vanilla pudding mix with 3 cups skim milk.
  • Stir in one whole 8 oz container of light whipped topping. 
Light whipped topping mixed with vanilla pudding packets and skim milk.
  • In a 9″ x 13″ dish, cover the bottom with a layer of gluten free graham crackers. 
  • To the layer of graham crackers add half of the vanilla pudding/whipped topping mixture, making sure to cover the graham crackers.
Bottom layer of gluten free graham crackers topped with half of the vanilla pudding/light whipped topping filling.
  • Add another layer of graham crackers on top of the vanilla pudding/whipped topping layer. 
Second layer of gluten free graham crackers.
  • Layer remaining vanilla pudding/whipped topping mixture on top of the second layer of graham crackers.
Second layer of remaining vanilla pudding/light whipped topping filling.
  • Finish the dessert with a final layer of graham crackers. 
Top and final layer of gluten free graham crackers.
  • For the final touches, empty a 16 oz jar of chocolate frosting into a small microwavable bowl and warm for a few seconds to make it creamy.
  • Gently spread frosting across the top layer of graham crackers. You may not need the entire bowl, just use what is needed.
Finishing touches, a chocolaty frosting layer atop graham cracker and eclair-like filling.
  • Refrigerate dessert over night and enjoy!

For me, this dessert was love at first bite. It was just the right amount of filling and graham crackers, all topped with a sweet icing topping, the perfect finish. This dessert takes literally 10 minutes to throw together and a somewhat painful length of time to let everything set. My advice, put the dessert together first thing in the morning and it’ll be ready for dessert after dinner the same day, just make sure you lick the spoon of the amazing filling for a little taste. But trust me, a little patience and it’ll be worth the wait because once the pudding has set and you’ve given a chance for all of the flavors to melt together, you end up with a perfect summer dessert of cake-like graham cracker layers mixed with fluffy pudding that tastes just like an eclair filling, all smothered in a sweet chocolaty icing. So add these ingredients to your shopping list for your 4th of July cookout this weekend and whip this dessert up, you’ll definitely have some happy diners on your hands!

Happy 4th of July!

Sincerely,

Lindsay

Gluten Free Chocolaty Eclair Cake
Write a review
Print
Ingredients
  1. 2 3.5oz boxes of gluten free vanilla instant pudding
  2. 3 cups skim milk
  3. 1 8oz container light whipped topping (I used Wegmans brand which states gluten free.)
  4. 16.8 oz gluten free graham crackers (I used three 5.6 oz boxes of Schar graham crackers.)
  5. 16 oz jar of chocolate frosting (Pillsbury states gluten free on their label.)
Instructions
  1. In a mixing bowl, combine two 3.5 oz packets of vanilla pudding mix with 3 cups skim milk.
  2. Stir in one whole 8 oz container of light whipped topping.
  3. In a 9" x 13" dish, cover the bottom with a layer of gluten free graham crackers.
  4. To the layer of graham crackers add half of the vanilla pudding/whipped topping mixture, making sure to cover the graham crackers.
  5. Add another layer of graham crackers on top of the vanilla pudding/whipped topping layer.
  6. Layer remaining vanilla pudding/whipped topping mixture on top of the second layer of graham crackers.
  7. Finish the dessert with a final layer of graham crackers.
  8. For the final touches, empty a 16 oz jar of chocolate frosting into a small microwavable bowl and warm for a few seconds to make it creamy.
  9. Gently spread frosting across the top layer of graham crackers.
  10. Refrigerate dessert over night and enjoy!
Adapted from The Kitchen Is My Playground
Gluten Free Mom To Be http://www.glutenfreemomtobe.com/

Gluten Free Garlicky Focaccia Appetizers, Perfect For Any Occasion

I’m always on the lookout for a delicious new gluten free bread option that bears some resemblance to non-gluten free bread that I once enjoyed. A few years back, I used to enjoy Panera sandwiches on all sorts of different breads, but one of my favorites by far was their focaccia, it was so light and perfectly seasoned. Flash forward several years and Panera sandwiches are off of our list of safe gluten free dinners out. I’m not going to lie, not being able to enjoy a soup and sandwich at Panera is a hard one to lose, especially since this restaurant holds a special place in my heart. I still remember my years in college when my parents would come up and visit me and we would head over to the local Panera. It was such a great environment for us to sit, eat, and catch up on my days at school. Not to mention, we would top it off by sharing a dessert or two and they’d always send off their poor college student with a to go bag of treats. 

All grown up now with no more gluten allowed, my Panera days are something of the past and so are those delicious bread choices (tear). Much to my surprise though, a couple of weeks ago I stumbled upon gluten free focaccia by Canyon Bakehouse. They’ve accomplished the impossible it seems in the gluten free world and have produced a fantastic product. Their focaccia is soft and moist and perfectly seasoned with rosemary and thyme, take a peak at how beautiful Canyon Bakehouse’s Focaccia is. It is definitely one of my new favorite breads and is perfect for a sandwich, dipping in some olive oil and seasonings, or something a bit fancier like my Gluten Free Garlicky Focaccia Appetizers, topped with caprese and spinach artichoke toppings. Top with either set of toppings and you’re good to go with some delicious appetizers or a side to your dinner. My little one and husband gobbled these up so quickly, I’m just lucky I got to try some too! Enjoy!

Note: Feel free to use as much or as little of each topping ingredient as you’d like. This recipe only lists the combination of topping ingredients you should use but really depends on which variety and how many of the focaccia appetizers you wish to make.

Ingredients:

  • Canyon Bakehouse Focaccia 
  • Butter (I use Smart Balance.)
  • 4 tbsp minced garlic
  • Shredded part-skim mozzarella cheese
  • Salt and pepper to season

         Caprese Toppings:

  • 2-3 plum tomatoes
  • Fresh basil leaves

         Spinach Artichoke Toppings:

  • Spinach (I like the frozen steamer bags of spinach.)
  • Artichokes (Jar of Cento artichokes are gluten free.)

Directions:

  • Preheat oven to 350 degrees. 
  • Slice focaccia lengthwise and cut into four long slices (2 from the top of the bread and 2 from the bottom).
  • Spread a thin layer of gluten free butter across each slice of bread.
  • Add 1 tbsp minced garlic to each slice of buttered focaccia and spread across the slice.  
Cut focaccia in half lengthwise and spread butter with minced garlic on top.
  • Toast focaccia in the oven for 15 minutes. 
  • While focaccia is toasting, prepare desired toppings to either do half caprese and half spinach artichoke or to do all of one or the other.
  • Slice 2-3 medium tomatoes.
  • Prepare frozen spinach.
  • Rinse and chop artichokes.
  • In a small bowl, combine even parts (about 1/2 cup, this amount really depends on which route you go with toppings) spinach and artichoke and add 2 tbsp shredded part-skim mozzarella and 2 tbsp parmesan cheese. 
  • Remove toasted focaccia from the oven and carefully cut into small squares. 
  • To sliced focaccia bites, add toppings. For the caprese garlicky focaccia bites, add a single slice of tomato and basil leaves on top. For the spinach artichoke garlicky focaccia, add 1 tbsp of spinach/artichoke mixture to bread.
Toast focaccia for 15 minutes at 350 degrees, then top with caprese or spinach artichoke toppings.
  • On both versions, top with part-skim mozzarella cheese (I used slices, but I’d use shredded next time I make these.).
Top with cheese.
Top with cheese.
  • Toast focaccia bites in the oven for an additional 10-15 minutes until cheese has melted and begun to brown. 
Carefully remove hot appetizers and add to serving dish.
  • Carefully remove bread from baking sheet and add to serving dish. 
  • Drizzle with a little bit of olive oil and season with salt and pepper if you’d like.
  • Serve warm and enjoy!
Delicious!
Delicious!

After making both varieties and having them taste tested by my toughest critics, the non-gluten free eaters in the house, seeing as not a crumb was left of each of them, I’d say that both are winners! The fresh basil combined with the tomatoes was so delicious, just like my favorite caprese summer salad; while the spinach artichoke bites reminded me my creamy spinach artichoke dip that I love to make, but instead of the dip part, a delicious piece of garlicky butter bread was in its place. In my opinion, you certainly can’t go wrong with buttering up and adding garlic to a tasty piece of bread, but why not take it a step further and add your favorite appetizer flavors too. 

Thanks to Canyon Bakehouse, these focaccia bites will be making an appearance in our house on a number of occasions in the future and will surely please all of our diners. The possibilities are truly endless with this kind of bread, so if you have any extra after making these appetizers, feel free to use it for your next lunch meat sandwich or cut it up and dip it in your favorite spices and olive oil! I can’t wait to incorporate this bread into another one of our meals in the near future!

Sincerely,

Lindsay


Gluten Free Garlicky Focaccia Appetizers
Toasted focaccia garlic bread, topped with caprese and spinach artichoke toppings.
Write a review
Print
Ingredients
  1. Canyon Bakehouse Focaccia
  2. Butter (I use Smart Balance.)
  3. 4 tbsp minced garlic
  4. Shredded part-skim mozzarella cheese
  5. Salt and pepper to season
Caprese Toppings
  1. 2-3 plum tomatoes
  2. Fresh basil leaves
Spinach Artichoke Toppings
  1. Spinach (I like the frozen steamer bags of spinach.)
  2. Artichokes (Jar of Cento artichokes are gluten free.)
Instructions
  1. Preheat oven to 350 degrees.
  2. Slice focaccia lengthwise and cut into four long slices (2 from the top of the bread and 2 from the bottom).
  3. Spread a thin layer of gluten free butter across each slice of bread.
  4. Add 1 tbsp minced garlic to each slice of buttered focaccia and spread across the slice.
  5. Toast focaccia in the oven for 15 minutes.
  6. While focaccia is toasting, prepare desired toppings to either do half caprese and half spinach artichoke or to do all of one or the other.
  7. Slice 2-3 medium tomatoes.
  8. Prepare frozen spinach.
  9. Rinse and chop artichokes.
  10. In a small bowl, combine even parts (about 1/2 cup, this amount really depends on which route you go with toppings) spinach and artichoke and add 2 tbsp shredded part-skim mozzarella and 2 tbsp parmesan cheese.
  11. Remove toasted focaccia from the oven and carefully cut into small squares.
  12. To sliced focaccia bites, add toppings. For the caprese garlicky focaccia bites, add a single slice of tomato and basil leaves on top. For the spinach artichoke garlicky focaccia, add 1 tbsp of spinach/artichoke mixture to bread.
  13. On both versions, top with part-skim mozzarella cheese (I used slices, but I'd use shredded next time I make these.).
  14. Toast focaccia bites in the oven for an additional 10-15 minutes until cheese has melted and begun to brown.
  15. Carefully remove bread from baking sheet and add to serving dish.
  16. Drizzle with a little bit of olive oil and season with salt and pepper if you'd like.
  17. Serve warm and enjoy!
Notes
  1. Feel free to use as much or as little of each topping ingredient as you'd like. This recipe only lists the combination of topping ingredients you should use but really depends on which variety and how many of the focaccia appetizers you wish to make.
Gluten Free Mom To Be http://www.glutenfreemomtobe.com/

Gluten Free/Dairy Free Strawberry, Banana, And Peach Oatmeal Bake

So I purchased a new bag of gluten free oats the other day for a brand new recipe that I wanted to try. I’m always looking for new filling and tasty breakfast options. For me, breakfast is always one of my hardest meals of the day, especially while I was pregnant. It never failed, if I’d had a piece of toast and fruit to go with it, I would be hungry literally an hour later. Along with smoothies, I found that oatmeal was always a great, filling breakfast option to pair with fruit or even toast if you want.  

This baked oatmeal dish is both gluten and dairy free which is amazing if your trying to watch your dairy intake too. Rather than your traditional microwavable oatmeal packet, this oatmeal is baked and resembles more of an oatmeal cake. I combined some of my favorite fruits, including strawberries, bananas, and peaches, so delicious! This dish is perfect with all of the fresh fruit that’s available during the summer, but also works great too with frozen fruit that you stock up on in the winter. I’ve already added this recipe to my pregnancy recipe binder and can’t wait to bake this one up and nibble on it for breakfast, lunch, or dinner, whenever I’m in the mood, that is if I can beat my little one to it, who seemed to be a huge fan too!

Ingredients:

  • 1 3/4 cups dairy free milk (I used Silk Almondmilk Unsweetened Vanilla)
  • 1 egg
  • 2 over-ripened mashed bananas
  • 1 tbsp pure vanilla extract 
  • 1/4 tsp ground nutmeg
  • 1/4 tsp ground cinnamon
  • 1 tsp baking powder
  • 2 cups quick cooking oats (Bob’s Red Mill offers certified gluten free oats)
  • 1 cup chopped strawberries
  • 1 cup chopped peaches
  • 1 over ripened sliced banana for topping
  • 1/4 cup light brown sugar for topping

Directions:

  • Preheat oven to 375 degrees.
  • Mash two bananas in a small bowl and combine with 1 3/4 cups dairy free milk, 1 egg, 1 tbsp vanilla, 1/4 tsp nutmeg, and 1/4 tsp cinnamon.
  • To the wet mixture, stir in 2 cups quick cooking gluten free oats and 1 tsp baking powder.  
  • Combine oatmeal mixture with 1/2 cup chopped strawberries and 1/2 cup chopped peaches. Set aside the remaining strawberries and peaches for topping.
Oatmeal with peaches, strawberries, and bananas.
  • Spray baking dish with non-stick cooking spray and pour in oatmeal mixture.
  • Top with remaining strawberries and peaches (about 1/2 cup of each) and 1 whole banana sliced. 
Top with remaining fruit before baking.
Top with remaining fruit.
  • Finally, sprinkle with 1/4 cup light brown sugar.
Sprinkle light brown sugar on top before baking.
  • Bake oatmeal for 25 minutes
  • Set oven to broiler and broil for about 5 minutes, until top has begun to caramelize.
Baked oatmeal.
Baked oatmeal.
  • Enjoy! Note: Oatmeal is best enjoyed right after baking, but if you’re making the night before, just reheat in the oven the next morning and you’re good to go.
dsfs
Finish by broiling to crisp the top of your oatmeal!

When I baked this dish the other night, after little one went to bed, our house was filled with the most delicious aroma, kind of like fruity oatmeal cookies were baking in the oven! I couldn’t wait to try a bite and kind of forced Dan too as well, mind you it was near 9:00 when I was trying to throw this dish together for breakfast the next morning. It was delicious, perfectly sweet thanks to the varieties of fruit inside without being overly sweetened. The best part about this oatmeal, besides its taste that is, was how easy it was to put together; you could certainly throw this together and bake it for breakfast on a Sunday morning, and if you’re short on time, just bake the night before and reheat in the oven the next morning. The next best part is, it’s a healthy and gluten free (and dairy free too!) breakfast option, thanks to the gluten free oats, fresh fruit, and Silk Almondmilk! 

This is a wonderful gluten free and dairy free breakfast, lunch, and even dinner option, if your an occasional breakfast for dinner kind of person like I am. I can’t wait to try out even more fruit combinations in this dish, maybe mixed berry next time!

Sincerely,

Lindsay 

Gluten Free/Dairy Free Strawberry, Banana, and Peach Oatmeal Bake
Write a review
Print
Ingredients
  1. 1 3/4 cups dairy free milk (I used Silk Almondmilk Unsweetened Vanilla)
  2. 1 egg
  3. 2 over-ripened mashed bananas
  4. 1 tbsp pure vanilla extract
  5. 1/4 tsp ground nutmeg
  6. 1/4 tsp ground cinnamon
  7. 1 tsp baking powder
  8. 2 cups quick cooking oats (Bob's Red Mill offers certified gluten free oats)
  9. 1 cup chopped strawberries
  10. 1 cup chopped peaches
  11. 1 over ripened sliced banana for topping
  12. 1/4 cup light brown sugar for topping
Instructions
  1. Preheat oven to 375 degrees.
  2. Mash two bananas in a small bowl and combine with 1 3/4 cups dairy free milk, 1 egg, 1 tbsp vanilla, 1/4 tsp nutmeg, and 1/4 tsp cinnamon.
  3. To the wet mixture, stir in 2 cups quick cooking gluten free oats and 1 tsp baking powder.
  4. Combine oatmeal mixture with 1/2 cup chopped strawberries and 1/2 cup chopped peaches. Set aside the remaining strawberries and peaches for topping.
  5. Spray baking dish with non-stick cooking spray and pour in oatmeal mixture.
  6. Top with remaining strawberries and peaches (about 1/2 cup of each) and 1 whole banana sliced.
  7. Finally, sprinkle with 1/4 cup light brown sugar.
  8. Bake oatmeal for 25 minutes
  9. Set oven to broiler and broil for about 5 minutes, until top has begun to caramelize.
  10. Enjoy! Note: Oatmeal is best enjoyed right after baking, but if you're making the night before, just reheat in the oven the next morning and you're good to go.
Adapted from Food Family Finds
Gluten Free Mom To Be http://www.glutenfreemomtobe.com/

Cheesy Bacon And Gluten Free Grilled Red Potatoes: A Perfect Gluten Free Side For Any Cookout!

As Father’s Day weekend rolled around, so did some beautiful weather of clear skies and mild temperatures. We certainly took advantage of the gorgeous summer skies by taking a morning trip down to the boardwalk, where it was perfectly sunny and breezy. Little one rode a bit in her stroller and then itched to walk the boards herself. Soon enough, we granted her wish and sprung her from her carriage so she was free to take in all of the sights and smells of the shore. She was so excited by the ocean and sand that laid before us and probably wanted to try a bit of it out, but no beach for us that day; instead, we ventured along through the arcades, sweet stores, and stopped to get a little treat to eat for our little girl (and Daddy too!).  

After trying our hand at a few Disney cranes, we finally tasted victory and won our little Disney lover her beloved Daisy! With Daisy in hand, little one nibbled on her soft pretzel while Daddy enjoyed a slice of boardwalk pizza. Sadly, I have to report that I couldn’t join my family in tasting any of the boardwalk deliciousness; oh how I miss those non-gluten free treats like Kohr’s raspberry and vanilla soft serve, massive slices of plain pizza, or those delicious vinegar fries (ugh these are really good!). Now, although there not much in the way of gluten free eats, at one of the dining locations on the boardwalk, they do offer a gluten free pizza that is cooked in a separate pan and everything. Last year I just had to try it and really wasn’t a huge fan, but appreciated just being able to indulge a little in the boardwalk tradition of grabbing a bite to eat. Hopefully someday, the rest of the boardwalk joins the gluten free world.

After a beautiful morning of just us three, we were back at home ready to host all of the fathers and grandfathers in our family for a cookout. Hot dogs, hamburgers, tortellini salad, corn on the cob, baked beans, cucumber and tomato salad, potatoes on the grill, watermelon, chocolate cake, and ice cream bars, we had a huge array of food for all to enjoy. My favorite of the day was my gluten free potato dish that I cooked on the grill. We first fell for this one last summer after I’d found the recipe in a Taste of Home mini cookbook. With some gluten free adaptations, I had made a winner that my husband and I loved! With a special request from the Daddy of the day, I decided to make a huge portion of my Cheesy Bacon and Gluten Free Grilled Red Potatoes to hopefully please all of our guests. These potatoes are diced into small, bite-sized pieces and cooked until perfectly tender. They’re mixed with seasoned salt (one of our favorite grilling seasonings!), onions, chives, bacon, and cheese!. My little one, who hasn’t seemed to be a fan of potatoes unless we give her one or two in fry form, even liked these. The mixture of bacon, cheese, and potato is heavenly, truly perfect for any cookout!

Note: This is a family sized recipe, perfect for family picnics. We had 10 adults at our Father’s Day picnic and we had more than enough. If you’d like to make a smaller portion for a family dinner, just half the recipe and it’s perfect for a weeknight side dish.

Ingredients:

  • 6 large red potatoes, washed, peeled (optional), and cut into small bite size pieces (I love red potatoes!)
  • 2 medium yellow onion, chopped
  • 6 tbsp grated Parmesan cheese
  • 2 tbsp minced chives
  • 1 tsp seasoned salt (I use Lawry’s which is gluten free according to their website.)
  • 1/2 tsp black pepper
  • 4 tbsp butter (I use Smart Balance) 
  • 1 cup diced cooked bacon (If short on time, use Hormel bacon pieces)
  • 1 cup shredded part-skim mozzarella cheese
  • 1 cup shredded mild cheddar cheese

Directions:

  • Wash thoroughly, peel, and dice 6 red potatoes into small bite-size pieces. Feel free to leave the peels on if you prefer, I just gave them a quick and rough peel.
  • Chop  2 medium, yellow onion and set aside.
  • Combine potatoes, onions, 6 tbsp grated parmesan cheese, 2 tbsp chopped chives, 1 tsp seasoned salt, and 1 tsp black pepper in a large mixing bowl. 
  • Prepare foil pocket to hold potatoes for cooking on the grill. Heavy duty foil is the best, but just layer regular foil for a sturdier hold. I like to lay one long strip of foil on the counter and then a second perpendicular to the first. Then fold up bottom layer and make center into a bowl type pocket. Using a wide, shallow bowl for this is helpful to keep the form of your foil pocket. 
  • Add potato mixture to foil and dot with 4 tbsp of butter.
  • Close foil pocket by folding foil down around the potatoes and seal it tightly.
  • Carefully transfer potatoes to grill, cover and cook on medium heat for 15-18 minutes. Make sure potatoes are cooked until tender.
  • Cook and prepare bacon by dicing it into small, bite-size pieces. Alternatively, you can use prepared bacon pieces like those by Hormel, which are gluten free according to their website.
  • When done cooking, undo foil pocket carefully and add 1 cup of shredded part-skim mozzarella and 1 cup shredded mild cheddar cheese along with 1 cup diced cooked bacon to top of potatoes.
  • Reseal foil pocket and grill for an additional 5 minutes until all cheese has melted.
  • Remove foil pocket from grill and carefully open. Allow steam to escape from the pocket first before emptying potatoes.
  • Scoop potatoes into large serving bowl or serve potatoes in foil pocket (just tell your guests to be careful as the foil will be hot from sitting on the grill). 
Cheesy Bacon Grilled Potatoes
Cheesy Bacon Grilled Red Potatoes
  • Enjoy!
So delicious!
Enjoy!

Instead of moving these to a large bowl, you can always keep their presentation a bit prettier by serving them in their foil pocket. I love serving them like this, that way your guests can see all of the cheesy bacon goodness that tops the mound of diced potatoes. For this particular occasion though, I transferred them to another bowl since the foil is quite hot from the grill and we had some curious kids milling around the food table, not a good combo. Taste wise, these are certainly a crowd pleaser! Our Father’s Day cookout guests couldn’t stop raving about how yummy these were. And our little girl, the non-potato lover, loved them too! She gobbled down a couple generous forkfuls, a true feat for her when it comes to potatoes. 

So next time your having a big cookout, 4th of July maybe, or even just a weeknight cookout, pull this one out and you’ll have a winner! And don’t be afraid to half or adjust the recipe as necessary for your party size, you can’t make any mistakes with this one!

Enjoy!

Sincerely,

Lindsay

Cheesy Bacon and Gluten Free Grilled Red Potatoes
Write a review
Print
Ingredients
  1. 6 large red potatoes, washed, peeled (optional), and cut into small bite size pieces (I love red potatoes!)
  2. 2 medium yellow onion, chopped
  3. 6 tbsp grated Parmesan cheese
  4. 2 tbsp minced chives
  5. 1 tsp seasoned salt (I use Lawry's which is gluten free according to their website.)
  6. 1/2 tsp black pepper
  7. 4 tbsp butter (I use Smart Balance)
  8. 1 cup diced cooked bacon (If short on time, use Hormel bacon pieces)
  9. 1 cup shredded part-skim mozzarella cheese
  10. 1 cup shredded mild cheddar cheese
Instructions
  1. Wash thoroughly, peel, and dice 6 red potatoes into small bite-size pieces. Feel free to leave the peels on if you prefer, I just gave them a quick and rough peel.
  2. Chop 2 medium, yellow onion and set aside.
  3. Combine potatoes, onions, 6 tbsp grated parmesan cheese, 2 tbsp chopped chives, 1 tsp seasoned salt, and 1 tsp black pepper in a large mixing bowl.
  4. Prepare foil pocket to hold potatoes for cooking on the grill. Heavy duty foil is the best, but just layer regular foil for a sturdier hold. I like to lay one long strip of foil on the counter and then a second perpendicular to the first. Then fold up bottom layer and make center into a bowl type pocket. Using a wide, shallow bowl for this is helpful to keep the form of your foil pocket.
  5. Add potato mixture to foil and dot with 4 tbsp of butter.
  6. Close foil pocket by folding foil down around the potatoes and seal it tightly.
  7. Carefully transfer potatoes to grill, cover and cook on medium heat for 15-18 minutes. Make sure potatoes are cooked until tender.
  8. Cook and prepare bacon by dicing it into small, bite-size pieces. Alternatively, you can use prepared bacon pieces like those by Hormel, which are gluten free according to their website.
  9. When done cooking, undo foil pocket carefully and add 1 cup of shredded part-skim mozzarella and 1 cup shredded mild cheddar cheese along with 1 cup diced cooked bacon to top of potatoes.
  10. Reseal foil pocket and grill for an additional 5 minutes until all cheese has melted.
  11. Remove foil pocket from grill and carefully open. Allow steam to escape from the pocket first before emptying potatoes.
  12. Scoop potatoes into large serving bowl or serve potatoes in foil pocket (just tell your guests to be careful as the foil will be hot from sitting on the grill).
  13. Enjoy!
Notes
  1. This is a family sized recipe, perfect for family picnics. We had 10 adults at our Father's Day picnic and we had more than enough. If you'd like to make a smaller portion for a family dinner, just half the recipe and it's perfect for a weeknight side dish.
  2. Try serving these potatoes in their foil pocket! It makes for a great presentation and keeps the prettiness of the melted cheese and bacon on top intact. Just be careful, the foil will be hot so make sure you warn your guests before they start scooping.
Adapted from Taste of Home
Gluten Free Mom To Be http://www.glutenfreemomtobe.com/

Happy Gluten Free Mommy = A Homemade Gluten Free Carmine’s Salad

Is there any restaurant that you absolutely loved in your pre-gluten free life that you feared you’d never eat at again? I’m sure I’m not alone when I say ABSOLUTELY. I’m pretty sure each and every one of us has a similar anecdote, remembering our life before gluten was discovered as the source of our pain. Sadly, many a restaurant I’ve not been back to since going gluten free. However, there are those restaurants that have come through for us gluten free folk, like one of my all time favorite restaurants, Carmine’s. Carmine’s, which has locations in NYC, Las Vegas, Bahamas, Atlantic City, and Washington D.C., is a family style Italian restaurant that offers delicious food in an environment filled with a love and family atmosphere. 

I first met Carmine’s early on in our marriage before I removed gluten from my diet. It was love at first bite. I just loved the family sized style of serving, plastering gigantic sized menus on their walls rather than passing them out at the table (check out the pic below!), and finally my favorite feature is the overwhelming feeling of family that you get just from walking in the door, kind of like a big Sunday dinner at your grandmom’s house. 

Thanks to Carmine’s website for this great picture of one of their legendary, wall posted and oversized menu.

It was such a memorable first visit to Carmine’s and I imagined so many more in the years to come in our marriage. Little did I know that my world would change drastically in the next few months. Fast forward a year from then and I was now eating gluten free, scouring the internet to see what my dining out options may or may not be. I couldn’t help but to check Carmine’s, a place that we enjoyed not too long ago as newlyweds. Much to my surprise they offered a gluten free menu, as well as a number of other allergen free menus too! Check out their fantastic gluten free menu here!

I can’t explain how happy I was after I’d found out that Carmine’s had a gluten free menu. Better yet though, their gluten free menu wasn’t just their normal dishes minus sauces and sides, only offering plain pieces of meat or gluten free pasta, but they were their actual, mouthwatering dishes! I have to admit that after finding out this glorious news about Carmine’s we’ve enjoyed many a gluten free dinner since, especially while pregnant. Amazingly, I can still get my favorite dishes from before, just done to be gluten free now. My typical meal when we dine at Carmine’s is the Carmine’s Salad, Vodka Rigatoni, and the Titanic for dessert (this is a massively huge brownie ice cream sundae but so much more than just that, and was certainly a gluten free pregnant woman’s dream come true!), each of these dishes are made to be shared by the entire family but no worries, our comfy twosome make do just fine and always had leftovers for the next day.  

Since Carmine’s isn’t a local restaurant that we can go to every weekend (tear), which I know I know makes it even more special when we do go, I purchased their cookbook to make my gluten free versions at home. Now, even though I love each and every part of our Carmine’s meal, I’ve yet to recreate the vodka rigatoni and titanic dessert, but I had to attempt the Carmine’s Salad. This salad is not just a boring, regular salad. Despite it’s intimidating size when it’s plopped down in the center of your table, it is loaded chock full of fix-ins from assorted meats and cheese to loads of veggies and different leafy greens! My favorites in here are the mortadella, provolone, and roasted red peppers! 

With recipe in hand, I recreated our favorite starter at Carmine’s but making a gluten free Lindsay version. After some washing and chopping, I throw it together, mixing in lots of the veggies with the leafy greens and laying the meats and cheeses atop to add that pretty presentation factor that Carmine’s is known for. I tend to leave the dressing to add on per plate along with some of the wetter toppings like the roasted red peppers and pepperoncinis to prevent any sogginess if we have leftovers, which we always do. This is an amazing appetizer or main course, definitely a crowd pleaser in both presentation and taste! 

Note: This recipe is for a family sized salad (feeds about 4-5 people), so feel free to scale down or up according to your needs.

Ingredients:

  • Head of iceberg lettuce
  • 2-3 handfuls of arugula
  • 2-3 plum tomatoes quartered 
  • 1 small cucumber, chopped into bite size pieces
  • 3 tbsp of roasted red peppers 
  • 1/2 medium sized red onion sliced
  • 1/4 pound chopped provolone cheese 
  • 1/4 pound chopped mortadella 
  • 1/4 pound chopped genoa salami
  • Handful of large green olives 
  • Handful of large black or kalamata olives
  • Handful of pepperoncini 
  • Vinaigrette or I prefer Olive Garden Italian Dressing
  • Optional add ins: thinly sliced radicchio and you can even swap out the arugula for watercress but I prefer arugula

Directions: 

  • Wash all vegetables thoroughly.
  • Chop 1 head of iceberg lettuce and 2-3 handfuls arugula into smaller pieces.
  • Peel and chop 1 small cucumber into small, bite size chunks
  • Cut 2-3 plum tomatoes into quarters or smaller slices if you prefer. 
  • Slice 1/2 of a medium red onion into thin slices and separate rings. 
  • To a large mixing bowl (make sure you use a large one so you can mix together the ingredients), add some of the leafy greens and chopped veggies and mix them all together, setting the rest aside to scatter on top to make a very pretty, Carmine’s like presentation.
  • Next up, roughly chop up a 1/4 lb of the mortadella, genoa salami, and provolone. Make sure you pick out gluten free brands of these. There are a lot of prepackaged salamis and provolone that you can purchase that may mark gluten content on the label, if not you can call the company. As far as the mortadella, I had to order this one at the deli counter, selecting the Black Bear version that I know is gluten free.
Carmine's Salad with chopped mortadella, provolone, and salami.
Carmine’s Salad with chopped mortadella, provolone, and salami.
  • What I like to do, similar to the veggies, is mix in some of the meats and cheese into the salad mixture and put the rest aside to layer on top for a pretty presentation.
  • Once all of the pieces have been washed, chopped, and either mixed in or set aside, add your mixture to a large serving dish. Unfortunately, I didn’t have a larger dish on hand, but if you can, use a shallow, wide and long dish that you can really see all of the different ingredients in the salad!
  • Scatter the onion and cucumbers on top of the salad.
  • Add the green olives and black or kalamata olives, scattering them across the top.
  • Now, layer each of the meats and cheese, along with the tomatoes in sections on the salad, do in whatever order or pattern you’d like.
  • Now, you can either top the salad with the pepperoncini scattered around and the roasted red peppers placed in the center on top of the meats or you can leave them in separate serving bowls on the side. I recommend keeping them separate if you don’t anticipate eating all of the salad and would like to save for leftovers, it just keeps everything dry without becoming extremely soggy later on. However, if you have a larger family or making this for a party, add those babies on top and it’ll complete a beautiful salad!
  • As far as dressing, I do the same for this one, keeping it separate. However, for a large party, I would add to the mixing bowl and mix in the desired amount before plating it on the serving dish. As far as what dressing I use, I’ve tried to make the Carmine’s vinaigrette at home but haven’t loved how it’s turned out so I go with one of my favorite dressings that really adds to the salad, Olive Garden’s Signature Italian Dressing. Use whatever dressing you love though, I would recommend to use a vinaigrette or a lighter dressing of some sort.
Homemade Gluten Free Carmine's Salad.
Homemade Gluten Free Carmine’s Salad.
  • And voila! Here’s your finished product! I left the roasted red peppers and pepperoncinis aside so we could add them on as desired since I knew we’d have leftovers for the next day to enjoy. TIP: Here’s where a shallow but wide and long serving dish is fantastic because you’d be able to see all of the amazing additions underneath the beautifully chopped meats, cheese, and tomatoes on top. No worries though, it all tastes the same, so use whatever dish you have and arrange the ingredients in whatever fashion you’d like! 

This is by far one of my favorite salads that I’ve ever enjoyed and I’m a big salad person. The mixture of the meats and cheeses is amazing and I just love the iceberg lettuce with the arugula mixed in as well. This makes for a great summer dinner and can serve as an appetizer or a main course. Also, it’s an incredibly filling meal with all of the special additions. I have to say, although it satisfied my Carmine’s craving, it did make us both eager to return to Carmine’s for another meal in the near future. So I guess we’ll have to get planning, but for now I have my cookbook in hand and the gluten free versions that I’ve created over the years!

Enjoy!

Sincerely,

Lindsay 


Homemade Gluten Free Carmine's Salad
Write a review
Print
Ingredients
  1. Head of iceberg lettuce
  2. 2-3 handfuls of arugula
  3. 2-3 plum tomatoes quartered
  4. 1 small cucumber, chopped into bite size pieces
  5. 3 tbsp of roasted red peppers
  6. 1/2 medium sized red onion sliced
  7. 1/4 pound chopped provolone cheese
  8. 1/4 pound chopped mortadella
  9. 1/4 pound chopped genoa salami
  10. Handful of large green olives
  11. Handful of large black or kalamata olives
  12. Handful of pepperoncini
  13. Vinaigrette or I prefer Olive Garden Italian Dressing
  14. Optional add ins: thinly sliced radicchio and you can even swap out the arugula for watercress but I prefer arugula
Instructions
  1. Wash all vegetables thoroughly.
  2. Chop 1 head of iceberg lettuce and 2-3 handfuls arugula into smaller pieces.
  3. Peel and chop 1 small cucumber into small, bite size chunks
  4. Cut 2-3 plum tomatoes into quarters or smaller slices if you prefer.
  5. Slice 1/2 of a medium red onion into thin slices and separate rings.
  6. To a large mixing bowl (make sure you use a large one so you can mix together the ingredients), add some of the leafy greens and chopped veggies and mix them all together, setting the rest aside to scatter on top to make a very pretty, Carmine's like presentation.
  7. Next up, roughly chop up a 1/4 lb of the mortadella, genoa salami, and provolone. Make sure you pick out gluten free brands of these. There are a lot of prepackaged salamis and provolone that you can purchase that may mark gluten content on the label, if not you can call the company. As far as the mortadella, I had to order this one at the deli counter, selecting the Black Bear version that I know is gluten free.
  8. What I like to do, similar to the veggies, is mix in some of the meats and cheese into the salad mixture and put the rest aside to layer on top for a pretty presentation.
  9. Once all of the pieces have been washed, chopped, and either mixed in or set aside add your mixture to a large serving dish. I didn't have a larger dish on hand, but if you can use a shallow, wide and long dish that you can really see all of the different ingredients in the salad!
  10. Scatter the onion and cucumbers on top of the salad.
  11. Add the green olives and black or kalamata olives, scattering them across the top.
  12. Now, layer each of the meats and cheese, along with the tomatoes in sections on the salad, do in whatever order or pattern you'd like.
  13. Now, you can either top the salad with the pepperoncini scattered around and the roasted red peppers placed in the center on top of the meats or you can leave them in separate serving bowls on the side. I recommend keeping them separate if you don't anticipate eating all of the salad and would like to save for leftovers, it just keeps everything dry without becoming extremely soggy later on. However, if you have a large party, add those babies on top and it'll complete a beautiful salad!
  14. As far as dressing, I do the same for this one, keeping it separate. However, for a large party, I would add to the mixing bowl and mix in the desired amount before plating it on the serving dish. As far as what dressing I use, I've tried to make the Carmine's vinaigrette at home but haven't loved how it's turned out so I go with one of my favorite dressings that really adds to the salad, Olive Garden's Signature Italian Dressing. Use whatever dressing you love though, I would recommend to use a vinaigrette or a lighter dressing of some sort.
  15. And voila! Here's your finished product! I left the roasted red peppers and pepperoncinis aside for us to add in as desired since I knew we'd have leftovers for the next day to enjoy. TIP: Here's where a shallow but wide and long serving dish is fantastic because you'd be able to see all of the amazing additions underneath the beautifully chopped meats, cheese, and tomatoes on top. No worries though, it all tastes the same, so use whatever dish you have and arranged the ingredients in whatever fashion you'd like!
Adapted from Carmine's Cookbook
Gluten Free Mom To Be http://www.glutenfreemomtobe.com/

1 2 3 4